So when I first moved back in with my parents, I wanted to get a desk so I can have a station for my blogging, creating and to keep myself organized. But since my room is smaller, I decided against spending the money on something I don't really have room for. BUT when things are free, how can you say no??
A few days ago, I was driving and I saw a desk on the side of the road. I pulled over, and aside from minor water damage making the sides chip off, it was in great shape! I checked it out, and tried to finagle it into my car. I have a Ford Focus, and had to leave my trunk open while I drove back to my house. While shifting it into the trunk, 11 cents fell out of a drawer, so I made money on this deal.. well, not really. I shoved it in my car and brought it home. Then, I had to go to Home Depot to pick up new wood for the sides, and as I turned off my street I thought, "Now all I need is to buy a chair" and low and behold, some person making some room in their house, and put a perfectly good chair on the curb for a lucky little DIY-er like me. The chair, had a few spider sacks, YUCK, and seriously needed a new cushion, but was perfect for my new street desk set!
I thanked the gods for shining on me and stuck the chair in my car and went on my way! Ever heard of 'ask and yee shall receive' well after I found the chair, I asked for $100, nothing. I guess it's selective grants..
So I got home, did my sanding and started painting the desk. For the chair, I decided to attempt to spray paint it instead of painting with a brush. This was going to make it go faster, especially because I'm heading deeper into December and going to run out of nice days to paint. And just like that, the sun went down, and it started to rain.
I was SO excited to find this, because I truly believe having a desk gets those creative juices flowing and I can't wait to get crafting and finish my Christmas presents, my wrapping and work on my wedding things!
Have you found anything in the street? What do you think about the importance of a desk? Do you have your own creative space??
Stay tuned, Stay crafty and Stay searching!
Wednesday, December 7, 2011
Monday, November 21, 2011
Say Yes To The Dress Application!
So I just finished my application for Say Yes To The Dress! I tried to do it a few weeks ago, but I had trouble deciding on my answers! It was really long, but fun overall!
I had to describe myself and style in three words each.. HARD. I came up with bubbly, creative and enthusiastic and interesting, colorful and individual for style. I feel like those are accurate decriptions, right? Then say why I think I would be fun to watch on TV.. EASY. Hahaha
I liked the application because it gave me a chance to reflect on what I'm looking for for a dress, think about my wedding style and opinions! Good one TLC, now just pick me for your show!!
One thing I realized that I don't have at all are traditions. We're not doing a church ceremony, and we're sort of making our own ceremony out of a mixture of different things. Then I don't have any specific articles of clothing or jewelery, so I feel like I'm missing something. James always tells me we should start our own traditions, but a part of me wishes I had a family tradition to carry on.
This week, James and I figured out some wedding things, and looked at a venue we both REALLY REALLY REALLY like. This venue doesn't have the ocean view, but we feel so strongly about it, and it fits our budget! We went to visit, and it was SO nice! Decision to be announced soon!
After we got back from the venue, we sat in the car and did this!


So what are your traditions? Do you have a certain veil to use? Are you wearing a family heirloom?? Are you forging your own route and doing things your own way? Are you going to draw moustaches on your fingers?
Wednesday, November 16, 2011
Birthday Post, Birthday Post
You may know the song "Birthday Sex," so when reading the title of this blog, sing it to that.
Anyway, so the weigh in of my 22 before 22 goal was yesterday and, I lost 12pounds. I'm actually pretty happy with myself, 12pounds is alot, and at least I lost weight. Small steps here people. I'll keep you updated as to when I finally get to 22, and then my major milestone points along the way.
But I do need to deeply apologize for not keeping up with the posting. James and I have been very busy doing our planning, but also work has picked up tremendously. After spending 8 hours staring at a screen, it's a little difficult to bring myself to look at one at home.
But I do promise to get back into my routine of posting and I'll let you know what I was up to in my hiatus!
Stay tuned, stay crafty and stay patient =D
Tuesday, October 25, 2011
Bureau Re-Fab!
First off, I want to say, I'm still at 4pounds. Only 18 to go in 21 days, I'm sticking to it!
James and I very quickly realized that we no longer have 2years to go, but am almost down to 1.5years! Crazy how time flies! Anyway, we really got down to business and got some things planned, we even chose our wedding venue and set our date!!! That's to come in a blog near you!
But to the point of this blog post:
When I moved back in with my parents, I quickly realized that my small bureau would not be enough for all my clothes/stuff. I needed a little more space, and was planning on buying a new bureau. I had a bureau I was going to throw out and never did, so my thrifty side came out and same with the nightstand, I realized I had a perfectly good piece of furniture that would do just the trick in my new, smaller space at my parents.
The lingerie chest was my aunt's, then got passed to me. Its been through a few moves, and a younger me who used to write my name on everything when I finally learned how to write. It's been through a lot and structurally is in good shape, but needed some sanding, paint and a lot of love.
Here are the before pictures of the lingerie chest, which I'll call a bureau, because I feel dirty saying lingerie that many times in a post:

 *edge has a TON of dings in it
 *The top of the bureau is lifting off and needs new screws
 *Sorry Alladin, you can have your lamp back!
*NOTE: the staples holding the back of the bureau came loose, so it needed a few new ones
See what I mean? Structurally (for the most part) great! Looking a little dated, but still in great shape, and a ton cheaper than going out and buying a whole new bureau!
For the top, I put in a few new screws and staples and done! All set for the rest of the re-fab! Now the top had some sort of formica top, which is great for resisting scratches and stains, cause it's a counter top, but not my best friend to re-paint. I used sandpaper to rough it up, then more to smooth that out a little. Overall I probably did four coats to completely cover the top.
The drawer fronts were made out of particle board, so in some spots where there was water damage, or cracks, made it difficult to sand without ruining the drawer front. The sides were a piece of cake, thank God for normal wood. Now down to the legs.. as you saw, detailed. I popped off Alladin's lamp and sent the Genie away to live in my craft bag, so I can sit on that and maybe be Princess Jasmine for Halloween, or figure out something else to do with it.. OK done with my lamp raves (for now). The legs were made out of some sort of plasticky resin, so I lightly sanded and painted, they look great!
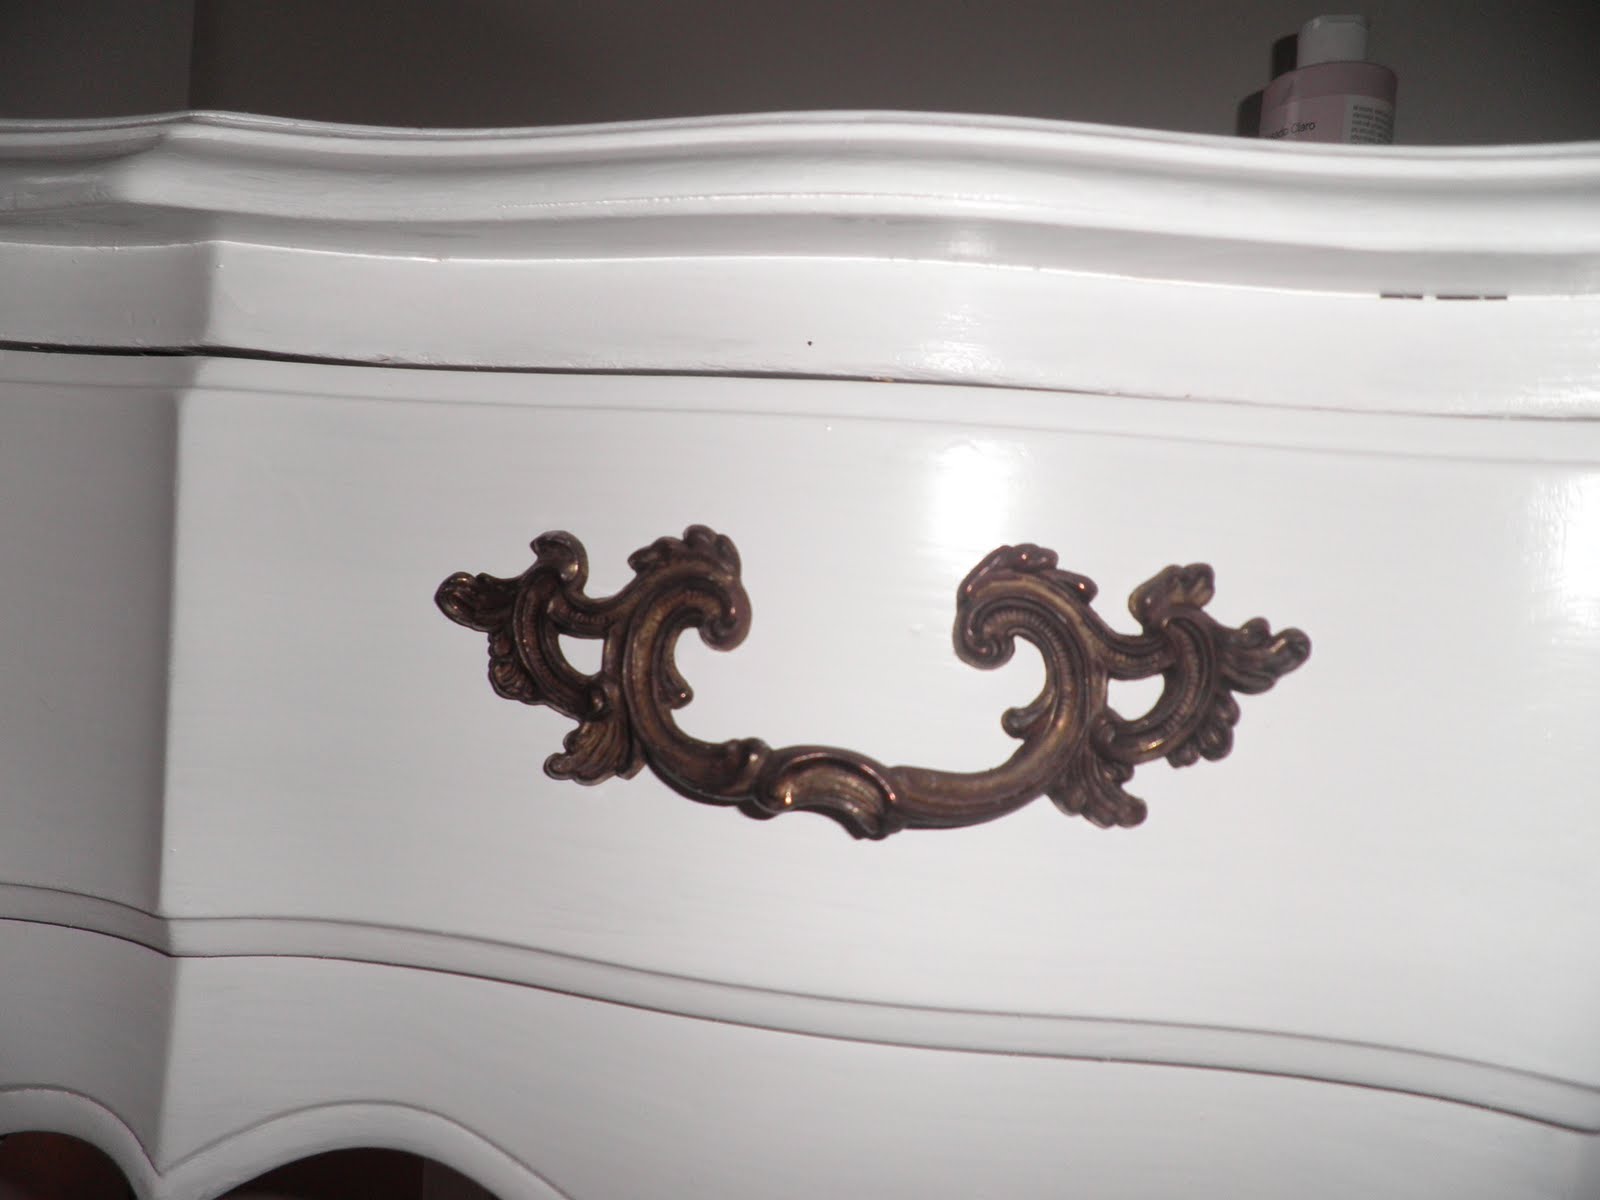
I painted the whole thing white, and wanted to do detail in blue and gray to match the nightstand. I was going to leave the sides white and do a gray stencil, probably the second worst idea I've ever had. It was horrendous. So then, why not try blue detail, PERFECT! The drawers stayed white, but that divider on each drawer turned blue and the detail on the top drawer was the lucky winner for the stencil!
I love it!! It now looks like the nightstand and bureau are siblings and sort of look like a matching set! Here's the reveal!


TIP: Know exactly the surfaces you have to work with, and get the proper supplies, it'll save tons of time. TIP: Stay confident and don't be afraid to take on a challenge, look at these two great pieces of furniture I now have that were going to end up in a dumpster somewhere! TIP: There's nothing a few coats of paint won't fix! TIP: Look realistically at your budget and see the ways you can save even a teensy bit.
A new bureau would have cost me around $50, but re-fabbing this one, was pretty much free! I already had the paint, stencil, screws and staples so all it took was my time, which was probably like 6hours combined.
Stay tuned, stay crafty and stay thrifty (it really pays off ;])
James and I very quickly realized that we no longer have 2years to go, but am almost down to 1.5years! Crazy how time flies! Anyway, we really got down to business and got some things planned, we even chose our wedding venue and set our date!!! That's to come in a blog near you!
But to the point of this blog post:
When I moved back in with my parents, I quickly realized that my small bureau would not be enough for all my clothes/stuff. I needed a little more space, and was planning on buying a new bureau. I had a bureau I was going to throw out and never did, so my thrifty side came out and same with the nightstand, I realized I had a perfectly good piece of furniture that would do just the trick in my new, smaller space at my parents.
The lingerie chest was my aunt's, then got passed to me. Its been through a few moves, and a younger me who used to write my name on everything when I finally learned how to write. It's been through a lot and structurally is in good shape, but needed some sanding, paint and a lot of love.
Here are the before pictures of the lingerie chest, which I'll call a bureau, because I feel dirty saying lingerie that many times in a post:


*NOTE: the staples holding the back of the bureau came loose, so it needed a few new ones
See what I mean? Structurally (for the most part) great! Looking a little dated, but still in great shape, and a ton cheaper than going out and buying a whole new bureau!
For the top, I put in a few new screws and staples and done! All set for the rest of the re-fab! Now the top had some sort of formica top, which is great for resisting scratches and stains, cause it's a counter top, but not my best friend to re-paint. I used sandpaper to rough it up, then more to smooth that out a little. Overall I probably did four coats to completely cover the top.
The drawer fronts were made out of particle board, so in some spots where there was water damage, or cracks, made it difficult to sand without ruining the drawer front. The sides were a piece of cake, thank God for normal wood. Now down to the legs.. as you saw, detailed. I popped off Alladin's lamp and sent the Genie away to live in my craft bag, so I can sit on that and maybe be Princess Jasmine for Halloween, or figure out something else to do with it.. OK done with my lamp raves (for now). The legs were made out of some sort of plasticky resin, so I lightly sanded and painted, they look great!
I painted the whole thing white, and wanted to do detail in blue and gray to match the nightstand. I was going to leave the sides white and do a gray stencil, probably the second worst idea I've ever had. It was horrendous. So then, why not try blue detail, PERFECT! The drawers stayed white, but that divider on each drawer turned blue and the detail on the top drawer was the lucky winner for the stencil!
I love it!! It now looks like the nightstand and bureau are siblings and sort of look like a matching set! Here's the reveal!


TIP: Know exactly the surfaces you have to work with, and get the proper supplies, it'll save tons of time. TIP: Stay confident and don't be afraid to take on a challenge, look at these two great pieces of furniture I now have that were going to end up in a dumpster somewhere! TIP: There's nothing a few coats of paint won't fix! TIP: Look realistically at your budget and see the ways you can save even a teensy bit.
A new bureau would have cost me around $50, but re-fabbing this one, was pretty much free! I already had the paint, stencil, screws and staples so all it took was my time, which was probably like 6hours combined.
Stay tuned, stay crafty and stay thrifty (it really pays off ;])
Monday, October 17, 2011
Everybody's working for the weekend!
My First weigh in.. I lost three pounds!!!!!! Yay, only 19 more to go!
This past weekend, I got the most out of fall. James and I picked out pumpkins for us to carve and then we baked! We made cranberry pumpkin bread and honey cranberry muffins. Why cranberry? Because while we were in NH last weekend, we stopped at a precious little farm stand and bought a pint, which gave us a little more than 2cups worth of cranberries! Perfect! I got inspired and we bought the appropriate items to finish the recipes.
Now, I preferred the cranberry bread. I got the recipe off of allrecipes.com, where I usually like to get my recipes. Real people and really great recipes. You can sort them by the prep time and cost, and how easy they are to make! A great website, check it out! The honey cranberry muffins, I found on a random website. It was good, but salty.. It only called for 1 teaspoon, but it was too salty and overpowered the other flavors.
For the bread, the only additional supplies (aside from sugar, flour, etc) was a can of pumpkin, pumpkin pie spice and cranberries. It is a really nice sweet bread. Perfect for breakfast paired with a cup of coffee, while you read the paper in your pajamas, trust me, it's that good! The recipe we made, made three loaf pans worth of bread. TONS, but it's soooo yummy! We'll probably freeze one and save it for Thanksgiving or maybe even Christmas, WILD I can't believe that it's that close to the holidays!!
In addition to all these fall items, I started the re-fab of my antique bureau and started a Christmas present for my nephew. Now the present, I'm going to leave you hanging on as my sister-in-law reads my blog, and I don't want to spoil the surprise, but this is a yard sale find and is SUPER cool and I can't wait to give it and share how I re-did it.
That's all for now friends, make sure you come back soon to hear about my bureau project!
Stay tuned, stay crafty and stay cooking!
Tuesday, October 11, 2011
22 before 22
I'm sorry, so sorry. I left you stranded with no notice, for a week. No ideas of what to look forward to, no ideas to ponder, nothing. I'm truly sorry. Work has taken a turn for BUSY and I've been a little preoccupied. Plus, Columbus Day came and my family has a tradition of vacationing in New Hampshire, so that is where I was Friday afternoon to last night.
But anyway here's what my busy little brain has been working on!
In preparation for my wedding, I need to get skin-nayyyyy to look awesome in my dress, pictures not to mention all the wedding festivities (shower, bachelorette party, honeymoons.. Hey, I can dream can't I?). So many reasons, aside from increasing my life expectancy, health, and all those other boring things. Oh, and extra motivation, one of my brothers is renewing his vows with his wife in September 2012, and another brother (I have three total, you'll hear about the last one later) is getting married for real in December, and then my wedding is June! Holy Nuptuals, I'm going to be wedding-ed out!
Back to the point: James and I will be taking our save the dates in June 2012, so I'm thinking of trying to lose the majority of what I want to lose before our engagement pictures for the save the dates. That way I don't have to stress myself out even more about looking phenomenal on top of all the other wedding things to get done. James is joining me in this plan and is going to get fit too! I'm totally ready to start my wedding weight loss journey so we can start our life together (so corny, I know, but couldn't resist)!
So to kick it all off, I want to try and lose 22 pounds before I turn 22! The terms are simple, lose 22 pounds before November 15, 2011. My final weigh in will be the morning of my birthday. If I lose more than 22 (aiming high!!) then I will continue and hope to lose 25, 30 and increase it after that (again if, and I'm aiming high here). I started this 22 before 22 campaign last Wednesday, so my first weigh in will be tomorrow, EEK!
What are your wedding weight loss goals? Do you have any special occasions coming up that you want to get fit for? Wanna join me in my 22 before I'm 22 campaign? Is your fiance joining you in your weight loss journey?
Stay tuned, stay crafty, and stay dieting!! Wish me luck!
Sunday, October 2, 2011
Nightstand Re-Fab: Part Three
It's FINALLY done! It took me a week, just 7 teensy days to revamp the entire thing. I feel like it took SO long, just because I had to brainstorm a ton for it, execute and make sure it looked good!
So the finishing touches: add on the handle, and paint the details, and design the edges. Easy right? NO! Well reattaching the handle was..
Here are the pictures with the 2nd coat of paint on and what I started with for the night.


So first, I painted the drawer edging blue, I did use tape for this part. Here, the tape worked great, especially because the curves in the wood made it a little difficult.
Then I painted the edges of the detailed section blue, and I decided to paint the edge of the legs to make them stand out a little more in the same color. I did use tape one on leg, but the amount of time it took compared to how impatient I am wasn't worth it. Plus, not having a ton of paint on the brush and using a small artist's brush was just what I needed! After I painted one edge of the leg, I realized I needed to paint the other because it didn't look right otherwise.
I also decided to paint the edge of the surface (again in blue) to make it pop a little more, and I think it really looks awesome!
So now for the detailed sections:
Going with my new bedding, I decided to paint the soon to be fabulous section gray. I bought a stencil at Michael's and wanted to put it on the detail of the nightstand. So I cut the section of the stencil I wanted, and used painter's tape to place it where I was going to paint it. Then I took a dobbing brush and painted blue over the stencil.
 Then moved over to the other side, this one I messed up a little, painted outside the lines. I tried to wipe it off quick, but that chipped the gray paint, so I had to re-paint it all together (did I mention I'm impatient?)I used a wet paper towel to wipe off the paint and then a dry one to.. dry it.
So both sides are stenciled and all the edges are painted! I went back over each area, and if I smudged paint, I took a wet paper towel and sort of rubbed it off (the beauty of using gloss paint). Don't rub too hard otherwise you'll take off the base coat.
Are you ready? Cause here it is. You've been good, so I think you're desrving of this masterpiece.. So yup, Here is the finished product!!!!


Here's the before before picture:

What a difference!!!
I'm officially obsessed with it! I almost packed it up in my car and took it to work to proudly display in my cube for the office to see. I LOVE IT!! AND it matches the headboard SO well and is so pretty! I think it is adulty, and will work in James and my bedroom (when we get one) and I just want to cuddle with it because I'm a proud mom of a nightstand!
So total cost breakdown:
$1.58 lemons
$6.43 stencil (on sale and a coupon!)
$2.12 dobbing brush (on sale and a coupon!)
$3.20 gray sample paint
Total cost: $13.33!!!!!! For an antique nightstand! What a deal!
So here are my tips-
TIP: Painting tape is great, but I was too impatient and excited to use it. But it's also not perfect for deep crevices or curves (which is what I was working with).
TIP: For those small/detailed areas, use a small brush and sparing paint. Having to much causes globs and it's easier to do a second coat than to have to sand, strip and start the process all over again.
TIP: Get an idea of what your goals are for the project. Your creative juices will get flowing and more will come to you, so be open and try it, and if you don't like it, you can always start over.
TIP: Don't rush, take your time with every step. You'll thank yourself later!
I'm so happy that this is my first flip! I'm so proud of myself for completing this, and especially in just a week! I think this was a great stepping stone to bigger and more intimidating projects, but I'm ready to take on any challenge now, and I think I have the perfect thing to start next!
Stay tuned, stay crafty and stay confident!
So the finishing touches: add on the handle, and paint the details, and design the edges. Easy right? NO! Well reattaching the handle was..
Here are the pictures with the 2nd coat of paint on and what I started with for the night.

So first, I painted the drawer edging blue, I did use tape for this part. Here, the tape worked great, especially because the curves in the wood made it a little difficult.
Then I painted the edges of the detailed section blue, and I decided to paint the edge of the legs to make them stand out a little more in the same color. I did use tape one on leg, but the amount of time it took compared to how impatient I am wasn't worth it. Plus, not having a ton of paint on the brush and using a small artist's brush was just what I needed! After I painted one edge of the leg, I realized I needed to paint the other because it didn't look right otherwise.
I also decided to paint the edge of the surface (again in blue) to make it pop a little more, and I think it really looks awesome!
So now for the detailed sections:
Going with my new bedding, I decided to paint the soon to be fabulous section gray. I bought a stencil at Michael's and wanted to put it on the detail of the nightstand. So I cut the section of the stencil I wanted, and used painter's tape to place it where I was going to paint it. Then I took a dobbing brush and painted blue over the stencil.

So both sides are stenciled and all the edges are painted! I went back over each area, and if I smudged paint, I took a wet paper towel and sort of rubbed it off (the beauty of using gloss paint). Don't rub too hard otherwise you'll take off the base coat.
Are you ready? Cause here it is. You've been good, so I think you're desrving of this masterpiece.. So yup, Here is the finished product!!!!


Here's the before before picture:

What a difference!!!
I'm officially obsessed with it! I almost packed it up in my car and took it to work to proudly display in my cube for the office to see. I LOVE IT!! AND it matches the headboard SO well and is so pretty! I think it is adulty, and will work in James and my bedroom (when we get one) and I just want to cuddle with it because I'm a proud mom of a nightstand!
So total cost breakdown:
$1.58 lemons
$6.43 stencil (on sale and a coupon!)
$2.12 dobbing brush (on sale and a coupon!)
$3.20 gray sample paint
Total cost: $13.33!!!!!! For an antique nightstand! What a deal!
So here are my tips-
TIP: Painting tape is great, but I was too impatient and excited to use it. But it's also not perfect for deep crevices or curves (which is what I was working with).
TIP: For those small/detailed areas, use a small brush and sparing paint. Having to much causes globs and it's easier to do a second coat than to have to sand, strip and start the process all over again.
TIP: Get an idea of what your goals are for the project. Your creative juices will get flowing and more will come to you, so be open and try it, and if you don't like it, you can always start over.
TIP: Don't rush, take your time with every step. You'll thank yourself later!
I'm so happy that this is my first flip! I'm so proud of myself for completing this, and especially in just a week! I think this was a great stepping stone to bigger and more intimidating projects, but I'm ready to take on any challenge now, and I think I have the perfect thing to start next!
Stay tuned, stay crafty and stay confident!
Thursday, September 29, 2011
What a Wednesday!
So I think my new productive day is Wednesday. After work, I finished the nightstand YAY!!!!!!!!! But then kept going and put my bed together at my parent's place and attached my fabulous headboard, and then moved onto making some of the throw pillows for my bed! This took me about 5hours, and by the time I got home, I was soooo super tired I went to bed (hence the Wednesday title on Thursday).
For organizational and chronological purposes, I'll enlighten you all about my headboard and throw pillows in this separate post (we all know we like an organized blog). So stay tuned for my Nightstand Part Three post, but refresh yourselves on Part One and Part Two in the meantime!
I went to Joann's Fabric and I bought the fabric for the headboard and some throw pillows, and also got a few pillow forms. I want my bed to look like it should be in a magazine, that is my ultimate goal, I think it's doable.. right?
I already recovered the headboard, but just had to attach it to the bedframe. All you have do to is screw on two posts, and then bolt the posts to the bedframe. Super easy! Also, I recommend adding felt pads or something on the posts so it won't scratch the walls.
It looks even better with a real bed with it, see?!

My total cost of the HeadBoard was $19.23, which was the cost of the the Fabric. I know that's expensive for just fabric, but it's thick upholstery material and my only expense. A new headboard would have cost at least $100, so I think I made out on the deal.
Moving onto pillows:
I had two oversized pillows I bought from Linens and Things when it was going out of business, but they don't match anything I have and will not match anything in my new room. So I decided to take them and make new pillows! I bought the fabric at Joann's on clearance (cause I love a bargain) to make it match my new bedroom decor.
So the pillows from Linen's and Things look like this:

and I made one into the pillows on either end:
 **The gray on the end has a pink backing**
The two pillow forms now look like this (close up):

I still have one of the big pink pillows to transform, but I need more fabric, so that will come soon!
Cost Breakdown of my 4 new throw pillows:
Two pillow forms (on sale): $8.48
Gray rosette fabric (on sale): $3
Pink Fabric (on sale): $1.75
Leftover Headboard fabric: $0
Filling from old pillows: $0
Total cost for 4 Pillows: $13.23 which equals $3.31 per pillow!! Throw pillows at cost are usually at minimum $12 each! What a deal! It was SO easy to make the pillows too!
All you have to do is lay the fabric together so it'll look inside out, and stitch (by hand or machine, I used machine, WAY easier) a straight line down. I went over each corner a few times just to make sure it wouldn't come apart. Then pull the pillow right side out, and insert the pillow/stuffing. To seal the pillow, stuff it partially then stitch the majority of the top, finish stuffing it, then seal it off. Again I go over the corners to make sure it won't come apart. And Voila, pillows!
Please note my Facebook FanPage "Autumn Mae's Road to the Big Day" please 'like' it on Facebook!
Stay tuned. Stay crafty and stay excited for the big reveal of the nightstand!!
For organizational and chronological purposes, I'll enlighten you all about my headboard and throw pillows in this separate post (we all know we like an organized blog). So stay tuned for my Nightstand Part Three post, but refresh yourselves on Part One and Part Two in the meantime!
I went to Joann's Fabric and I bought the fabric for the headboard and some throw pillows, and also got a few pillow forms. I want my bed to look like it should be in a magazine, that is my ultimate goal, I think it's doable.. right?
I already recovered the headboard, but just had to attach it to the bedframe. All you have do to is screw on two posts, and then bolt the posts to the bedframe. Super easy! Also, I recommend adding felt pads or something on the posts so it won't scratch the walls.
It looks even better with a real bed with it, see?!

My total cost of the HeadBoard was $19.23, which was the cost of the the Fabric. I know that's expensive for just fabric, but it's thick upholstery material and my only expense. A new headboard would have cost at least $100, so I think I made out on the deal.
Moving onto pillows:
I had two oversized pillows I bought from Linens and Things when it was going out of business, but they don't match anything I have and will not match anything in my new room. So I decided to take them and make new pillows! I bought the fabric at Joann's on clearance (cause I love a bargain) to make it match my new bedroom decor.
So the pillows from Linen's and Things look like this:

and I made one into the pillows on either end:

The two pillow forms now look like this (close up):

I still have one of the big pink pillows to transform, but I need more fabric, so that will come soon!
Cost Breakdown of my 4 new throw pillows:
Two pillow forms (on sale): $8.48
Gray rosette fabric (on sale): $3
Pink Fabric (on sale): $1.75
Leftover Headboard fabric: $0
Filling from old pillows: $0
Total cost for 4 Pillows: $13.23 which equals $3.31 per pillow!! Throw pillows at cost are usually at minimum $12 each! What a deal! It was SO easy to make the pillows too!
All you have to do is lay the fabric together so it'll look inside out, and stitch (by hand or machine, I used machine, WAY easier) a straight line down. I went over each corner a few times just to make sure it wouldn't come apart. Then pull the pillow right side out, and insert the pillow/stuffing. To seal the pillow, stuff it partially then stitch the majority of the top, finish stuffing it, then seal it off. Again I go over the corners to make sure it won't come apart. And Voila, pillows!
Please note my Facebook FanPage "Autumn Mae's Road to the Big Day" please 'like' it on Facebook!
Stay tuned. Stay crafty and stay excited for the big reveal of the nightstand!!
Tuesday, September 27, 2011
Headboard and Hardwork!
In my quest to re-do my room, I decided I needed to re-cover the fabric headboard I have. My parents made it for me (see where I get my crafty-ness from?) when they re-did my room when I was 12. It looked great, but the fabric isn't really matching anything I'm going for now, plus it's old, a little ripped and it's just time for a change.. hence my whole room re-decoration project!
Here's the before picture!

Now I had help from my parents, which I'm grateful for. I had my ideas about how I was going to recover it, but their experience with the fabric headboard helped. I started ripping off the fabric, but it turned out that the fabric I bought could go right over the old, and you can't see it at all! Perfect cause ripping off the old fabric was a total pain in the.. you know where. Now, I was going tack on the new fabric from the bottom, and then do the two sides and finish with the top. It was easier to do the sides, so that way the pattern can be set straight on the headboard. Then I did the bottom and doing the top last worked great so I can fix any wrinkles, bunches, whatever.
TIP: Find a thick fabric, using upholstery would be best! This will hold together all the badding, but also hold up against the wear and tear it'll go through. TIP: Try using an industrial stapler, you need something that will go into the wood and hold it all together. A hammertack was too much to try and swing it while holding the headboard. It proved to be a dangerous situation. TIP: Lay it out across the front and try to make sure the pattern (if any) is straight, or how ever you want it.
Now to the top. Because of the heart shape, it was pretty hard for me to love this project. Also I was facing the back the whole time, so I couldn't see my work coming together but that also made the reveal even better!
Anyway. It was pretty difficult to get the fabric smoothed out over curve and not have it bunch together in the center. So I tacked the top of each curve, then snipped the fabric at the center and stapled it from the top of each curve and worked inward. Then did the top out to the corner.
This was pretty time consuming, and I definitely worked up a sweat! It was a ton of lifting, moving, smoothing, restapling, just a lot of hard and tedious work! But here's the finished product!

I LOVE IT! I think it looks really soothing and calm, and I just can't wait to make my bed and lay down and look at it day in and day out! I think it's very adulty, but also it's not too feminine so when James and I move in together, we'll be good, and I won't have to go through this again!
Stay Tuned, Stay Crafty and Stay Inspired.
Monday, September 26, 2011
Nightstand Re-Fab: Part Two
The second coat of paint is on! Now it's time to work on the handle.
I did a quick Google search on how to clean brass and found several solutions. First said to use ketchup. Now, this sounds extremely misleading, but it sort of worked. The only thing, is it took a ton of ketchup and a lot of time. The smell of it was absolutely making me nauseous. It was like a Heinz factory in the kitchen, AWFUL. So back to Google I went, and found something saying to take a lemon, dip it in salt and scrub. I knew this smell wasn't going to make me nauseous, so I was in.

I bought two lemons for $1.58, and used regular table salt, and scrub, scrub, scrub! I cut each lemon into small wedges, and scrubbed down to the rind. Cutting into the smaller pieces was great so the juice wasn't wasted. TIP: Make sure you don't have any cuts on your hands, otherwise the mixture of lemon juice and salt will kill you! TIP: Cut the lemons as you go, this way if you don't need them all, you can save it for something else!
Now for the reveal, Da Da Da DUNNNNN!!!!!!!

It looks great! I love how its sort of shiny, but not too new looking. It works well with the clean, crisp white and really pops. I'm going to save the picture of it for when the nightstand is completely finished!
Now for the price breakdown:
Ketchup: (already had)
2 Lemons: $1.58
table salt: (already had)
Detailed brass handle: (already had) but the normal cost is $40 and up!
Total cost: $1.58
Originally I was going to throw the handle out, and buy a new one, but I'm SO happy I didn't! What a treasure, and it really looks great!
TIP: Don't be overwhelmed by a project, and don't underestimate yourself! Give it a shot, you never know how something is going to turn out! TIP: Google is always there for you!
Look forward to Part Three: Finishing the detail on the nightstand!!
Stay tuned, stay crafty and stay determined.
Wednesday, September 21, 2011
Nightstand Re-Fab: Part One
I was in such a foul mood all day. All I wanted to do was come home and lay down in the dark and sleep the night away. Why? I have no idea. Just middle of the week slump I guess. I wanted to go to the gym, but my bad mood threw that idea out the fitness window. I didn't want to waste my evening, so I decided to get a jump start on re-fabbing (re-fabulous-ing, new term, its probably the next big thing) a part of my bedroom beautification on a budget.
So the task, taking a nightstand that was my part of mom's bedroom set from when she was little and re-finishing it to go with my new room.
Here are the before pictures, it is a brown/gold, that turned green over time.. The paint started chipping and lifting in certain spots.
 **Note my cat laying underneath the nightstand =D

Step One, Sanding. I have never sandedanything before, well I have, but nothing this intense or that I actually cared about working on. I had some help and advice from my dad on this one, which I am extremely grateful for. I took off the hardware for the drawer, which I will have to soak to get the rust off, but also I had to remove the wooden applique. One of them fell off during the move, and when I was taking the other off, it cracked. So rather than being able to save it for another project, it is beyond repair and in the big workshop in the sky. Now, when you start sanding something, start with the coursest sandpaper, and work your way to the finest piece. This will help get the last coat of paint or finish off, and then work the item down to getting a better paint job on the piece in the end. TIP: I recommend working outside, so the dust doesn't consume the inside of your home. TIP: I recommend using something firm to wrap the sand paper around, a block would work, to use for the edging or small cracks and crevises, otherwise your fingers will be killing you.. lesson learned =/
Progress pictures


Step Two, Painting. I've never painted a piece of furniture this detailed, but it wasn't that bad. TIP: Make sure you clean off all the dust before you start painting, using a wet cloth will work best. TIP: Taking long strokes, and not having a ton of paint on the brush made it a little easier to paint all the detail. This way there weren't any globs or drips that you'll have to go back and sand then paint over later.
Also, make sure there is enough lighting whereever you're painting, this way you'll be able to tell the spots you miss to get a better job done the first time around. Also, make sure everything is smooth and the paint it even on the surfaces.
I'm still working on the second coat but here is the nightstand of of now:


Still left to do: Second coat of paint, figure out how to get the rust off the hardware for the drawer and potentially figure out a new detail for the corners.
I don't know why, but just focusing on a project and letting all your frustration out was a great stress release, and now, I'm in a great mood! I'm really excited to finish the nightstand and see how the final product turns out!
Stay crafty, stay happy and stay tuned!
So the task, taking a nightstand that was my part of mom's bedroom set from when she was little and re-finishing it to go with my new room.
Here are the before pictures, it is a brown/gold, that turned green over time.. The paint started chipping and lifting in certain spots.


Step One, Sanding. I have never sanded
Progress pictures


Step Two, Painting. I've never painted a piece of furniture this detailed, but it wasn't that bad. TIP: Make sure you clean off all the dust before you start painting, using a wet cloth will work best. TIP: Taking long strokes, and not having a ton of paint on the brush made it a little easier to paint all the detail. This way there weren't any globs or drips that you'll have to go back and sand then paint over later.
Also, make sure there is enough lighting whereever you're painting, this way you'll be able to tell the spots you miss to get a better job done the first time around. Also, make sure everything is smooth and the paint it even on the surfaces.
I'm still working on the second coat but here is the nightstand of of now:


Still left to do: Second coat of paint, figure out how to get the rust off the hardware for the drawer and potentially figure out a new detail for the corners.
I don't know why, but just focusing on a project and letting all your frustration out was a great stress release, and now, I'm in a great mood! I'm really excited to finish the nightstand and see how the final product turns out!
Stay crafty, stay happy and stay tuned!
Monday, September 19, 2011
No Rest for the Wicked.
The moving verdict. I'm moving back in with my parents to save some money. I really want to be out on my own, but I think right now, it is smarter for James and I to live with our parents, and save for a home of our own. So.. I've become minorly obsessed with redoing my room and re-furbing the furniture I have that has been in storage for several months, and making over my bedroom so it look more 'adulty' but also, this way we'll have things for when we move in together.
On Saturday, I had a whole list of To-Do, to do. I started out by running a few errands and the last stop on my list was to make a trip to the bank, and on my way I stumbled upon some lovely yard sales! Now, I love a good yard sale, and by love, I mean head over heels, L-O-V-E yard sales. Plenty of weird stuff you don't really need but for some reason want to buy, walking through the maze of tables on a front lawn, listening to the people try and barter with the host and the best part, getting great deals.
My yard sale experience was successful. I found a few pieces we can use for our centerpieces (details to come in a blog near you), but I also found a few real treats!
I got this baby for $10!!

and this was still in it's wrapping from Kohls, originally priced at $29.99, I got it for $3!!

So all I had to do was pack them in my car, and take them home!
So after I finished hitting the sales, I went to Home Depot got some paint and a bigger paintbrush, I touched up the paint on both items, and voila!!! I also threw a new coat of paint onto my bookcase from when I was a little kid (which desperately needed it).
and here's my after picture!!

Here is my cost breakdown:
Bookcase $0 (already had), normal cost $50
Paint (semi-gloss interior white) $11
Paintbrush $3
Mirror $10, normal cost $40
Frame $3, normal cost $30
So in total, I spent $27, when to buy it all brand new would have cost over $120, talk about Extreme Deal-finding!!!!
All in all, saturday was a successful errand day, with a few added bonuses. I'm really pumped about my new items, and ready to take the plunge to move back in with my parents.
SPOILER ALERT: I ALSO painted an initial coat on an upcoming project I'm still in the middle of working on. Hopefully I'll finish that sometime this week.
SPOILER, PART TWO: I made my plan on re-finishing a nightstand that used to be my mom's when she was a kid. Super fun and full of DIY flare!
SPOILER, PART THREE: Tonight (Monday) I spent an hour at Joann's Fabric for yet another project on my to-do list
So here are some lessons I learned this weekend:
TIP: Don't get snobby, and if there is something in particular you're looking for, check out your local Goodwill/Salvation Army/Yard Sales/etc. You can find great pieces, at awesome prices. Most of the time, the things just need a little love (and lysol) and you're good to go!
TIP: For more detailed items, use a smaller paint brush, but for big things (bookcases, bureaus, etc) splurge and save yourself (and your back) the pain!
TIP: Don't sell yourself short, you can do it! Just take your time and pay attention and you'll be able to re-fab (short for re-fabulous) anything! But also, you can do it on a limited budget!
Stay tuned, stay crafty and stay inspired!
Sunday, September 18, 2011
MyMemories Software
Ahhhhh Sunday Morning.. laying in bed, with nothing on my agenda for the day, except to create. What a beautiful to do list to have!
What was your first Craft Project? A decorated picture frame? Re-finishing an old piece of furniture? I started out scrapbooking, the gateway craft which started my addiction for crafting. Have you tried it? Careful, it will consume you.
The only thing about scrapbooking, is it takes a lot of time and money. The supplies (pictures, stickers, papers, glue, etc) really add up, plus planning each page and the album in whole! This is why my scrapbooking has been put on the back burner, until now! I found My Memories scrapbooking software, and this is something really great! It's a digital software, where you can make as many albums as you like, decorate them however you want and share everything you make with your friends and family!!
Now, I love technology, but I am still old fashioned and don't like to do things online. So I was skeptical about how I would like the software, or how user friendly it is (cause I'm not very tech-savvy). I didn't need any directions, although I would have appreciated some information about all the features it has. The software is very open, so your creativity can flow through your fingers to the new albums you're making!
There are so many options so it's really versatile for any occasion you might be scrapbooking for! Grandma's birthday? Your niece's 1st birthday? Family trips to Bermuda? YES, YES, and YES! You can begin by choosing a template, or customize your own. You are able to add your own texts, embellishments, ribbons, and add the pictures you have on your computer, with out uploading or having to resize them! The best part, I think is, you can print each page you make, but also the software gives you margins to stay within so if you do print it, none of your creation will be cut off!
It's SO easy to use, and is really a great asset for scrapbookers everywhere.
Would you like to WIN a FREE copy of this software???????? If you fiddle around on www.mymemories.com, and comment below about your favorite background, or template, and comment on this blog post which one is your favorite, you'll be entered to win a FREE copy!!!!
I made an album to share the pictures from the day we got engaged!!


Want to buy a copy? Visit http://www.mymemories.com/digital_scrapbooking_software to buy your own, and use this code: STMMMS16888 to save money on your order!!!
I've already made three albums in 2hours, and I haven't had ANY coffee yet!! So get creative and get excited to win your own My Memories Software!!
Tuesday, September 13, 2011
Moving on out.... maybe?
...I want to be in a movie. Everytime I write in my blog, I think about Julie and Julia, and how I could be discovered and have a movie made abuot my life. But then I think, I'm not interesting enough to be in a movie, let alone the plot.
So James and I are contemplating moving in together, in the big world all alone. Well with my best friend Caitlin, and our cats. So not really alone, but on our own I should say. This thought is somewhat scary because 1) I'm stable and old enough to move out and survive (hopefully) 2)It's a big commitment to a place and it will take a lot of money (moving expenses, furniture, start up supplies, plus rent, utilities, etc) and 3) am I really ready to be out on my own and never turn back???
I lived at college all four years, three of which I spent in an on-campus apartment. I bought and made my own food, cleaned and furnished it all too. Since June, I've been living at my aunt's house. This is where I've been doing my crafting, cooking, blogging and whatever else. I was planning on moving back in with my parents as of October 1, but should I move back with them just to move back out a few months later? Why not just take the plunge and see how it goes.
It's not a question of whether I can do it or not, but if I want to do it right now. We've been looking up places and getting more information about apartments, and I love the idea of being out on my own, living with my fiance and BFF, but part of me just wants to wait, and I have NO idea why!!
Well as I look more and think about moving out, I'll share my thoughts with you all (whoever you are).
Monday, September 12, 2011
I'm getting married at...???
First off, I need to talk about the new Facebook game I'm obsessed with, Wedding Street. It's just like FarmVille, but it is all about weddings. I have a wedding planning shop where I get clients and plan their weddings, I have my own flower shop, bakery, dress shop and soon I'll unlock a store where I can make stationary.
Each client gives me their budget, deadline, theme, colors, etc. The more they like something I design, the more hearts, or happiness I'll get. You can earn coins to buy more things to use for each wedding and there are also quick games to play within the game. I TOTALLY recommend this! It's a good time waster, and it's something you can leave and come back to throughout the day.
Now down to business.
Finding the perfect venue for your ceremony and reception is extremely difficult. James wants a location near water (lake, pond, river, ocean, I think he'll even settle for a koi pond) and my main request is a nice garden or near tons of flowers. I feel like these are two reasonable requests, but we're having some minor delays finding a place. I've been researching since February, and there are only so many venues that fill both of those requirements. It is quite stressful, as we need to decide pretty soon considering our wedding date is fast approaching, and June is so popular, everything will be booked.. YIKES
After traveling around the state of Massachusetts, we found the House of the Seven Gables in Salem MA, and fell in love! Any place that you walk into and get butterflies over, means something. A seaside garden, a unique location in a great city full of life and history, it is a little small for our 120 guests, but we can make it work.
BUT having to go through their rental company, the prices are skyrocketing! Is it worth a majority of our wedding budget just on the venue and rentals??? Being frugal, we've decided to keep looking, but it makes me so sad to pass up on the only place I've seen where I imagined myself walking down the aisle. We're trying to schedule more tours, but how can I push myself when I really don't want to keep looking.
Also we can't schedule any tours because no one is open late on weekdays or weekends! I swear every place is open from 10-4 Monday-Friday. WHO is available then, and how can I get their job?? TIP: Save your sick or vacation time at your job so you can go look at the venue. Also make a list of what is important to you and your fiance, and try contacting the event coordinator to ask those things before you get to the place. TIP: After you figure out your wedding budget, think about how much of it you're willing to put toward each cost associated with the wedding. This might help you before you start looking for a venue.
In the end, we'll wed at the perfect place, but for now we're still on the prowl for that perfect spot to tie the knot. (I love rhyming).
Stay crafty friends.
Tuesday, September 6, 2011
Cooking and Painting, Painting and Cooking
A night home alone, just me, a new recipe and those darn popsicle sticks. Most women would get a glass of wine and a bubble bath, but I grabbed my apron and a paintbrush! The remnants of Hurricane Lee are upon the East Coast, and it's going to be a rainy, chilly week, perfect soup weather! So I decided to Google a recipe and try it!
Now, I know this blog is about preparing for my wedding, but why not add a few extra topics now and then to spice things up. Anyway, I need to be well rounded and domesticated to become the next Martha Stewart (sans the insider trading/tax evasion situation).
So my mission for the night: Sweet Italian sausage tortellini soup. For this you'll need
Chicken broth 42oz (I used low fat and low sodium)
Garlic -the recipe calls for 5 minced cloves, I say use as wanted
Sweet italian sausage
Spinach (fresh or frozen, just be sure to strain frozen)
Tomatoes and mushrooms (optional)
Olive oil
White Wine (optional)
Tortellini
What you do is saute the sausage, garlic and some oil. Bring the broth and wine to a boil, add in the vegetables, bring to a boil. Add the tortellini and after that is cooked, add in the sausage.
I, being awful at math added wrong and didn't get enough broth.. but if you add water, works just the same (I just added extra spices to make up for it). Also, I left the soup in the pan, but most of the broth evaporated, so I need to get more broth for my leftovers, which I can't wait to bring to work for this week! TIP: double check your math, and don't leave it in the pan, soup should have plenty of broth, thats what makes it soup.
Anyway, it was pretty good, and I'm not really a huge soup fan. After I ate I decided to FINALLY finish the popsicle sticks that have been sitting in the kitchen for a week. The blue took forever, even though we primed them with white first. When we were halfway through the project, James mentioned spray paint, which would have saved us a ton of time and effort, but there's nothing like painting love all over each of the 150 popsicle sticks, so hand painting it was.
TIP: When painting, make sure that there is space between each item, because as it dries, it WILL stick and it WILL chip your hard work. Lesson Learned. Now I wished I had finished them on a timely manner, but not having power and having to take care of all my weekend errands after work sort of threw me off. TIP: Make sure that you know how much a project will take (time, supplies, mental stamina, etc). If its a larger project, make sure you break it up, but more importantly, don't give up on it, you'll feel SO much better when its actually done.
There is nothing like crafting with some music 'bumping' in the background with a yummy new meal to woo my future husband with =]
SNEAK PEAK at my next project! I'm going to be reviewing the My Memories software. Look up mymemories.com and take a look around, because there is a chance that YOU could win a copy of it for yourself!! Also, if there is something you'd like me to try out before you do it, I'm open to all and any suggestion!
Stay crafty my friends.
Monday, August 29, 2011
Hurricane Survival
As Hurricane Irene blazes her way up the east coast, and people are braving the weather to get to the grocery stores for food, water, flashlights and other survival supplies, I went to AC Moore. My fiance, James and I went out and picked up supplies for one of our DIY projects for the wedding.
One thing I have trouble with is staying focused on one project at a time. I was all over the place trying to get ideas for other things we could do or make, but James, like always, kept me on track and focused to only get what we need right now. After a successful trip and making safely back from the store, we set up our station.
 The project for the night was to paint the handles for the fans we are making for the ceremony. It is going to be June, so providing a small hand fan will prevent our guests from getting too hot. We decided to paint half white, half navy and do all different colored backgrounds, so that when you look at our guests, it will be a sea of color =]
Well, it took a little long to paint the handles.. we only did the base white coat on all of them. TIP: use wax paper, the items you're painting won't stick, and thus chipping or damaging your hard work! Also be prepared to get a little dirty, craft paint comes off very easy, but will stain nail polish!!
Anyway, so we quit for the night on Saturday and did a little more on Sunday, but then James had to work, and about 20 minutes after he left, I lost power. I kept painting for an hour, but things got a little too dark and I couldn't see anything! I didn't end up getting power back until this morning (Monday) and I had to work, so now, I have a large stack of half painted, over sized popsicle sticks sitting in the kitchen, which I will hopefully finish sometime this week.
So all in all: 1) Stay focused and don't take on too much at a time. This can be very difficult when you're excited but getting too much or scattering your thoughts will only overwhelm you! 2) Don't get a manicure before painting anything =[ and 3) Mother Nature often ruins your timeline for your projects
Stay crafty my friends, even through a hurricane.
Saturday, August 27, 2011
For Everything There is a Season
After years of ridicule and teasing because I was named after a season, I always wanted to get married in the Fall, with big sunflower bouquets. But when I started putting ideas together and really making decisions with my fiance of things we wanted (or not), I realized, that I love Fall weddings, but an early summer if really for us.
I LOVE flowers, and this was one of my deciding factors. I want to get married in a field of wildflowers, with the sun shining bright. Color was another important thing to me. I want our wedding to be bright, bubbly and beautiful. My fiance (being the more practical one) thought about the risk in weather, and the fact that he wants to be by the water, so a cooler season may make things too chilly. The two of us decided that the things which are important to us and we really want, would be better suited in the summer.
It was difficult to part with my longterm nuptial dream of a fabulous Fall wedding, but I found it reassuring to know that the things we want will be very accessible in the Summer. When you figure out things that you and your fiance want, and especially don't want, it is easier to decide by the season first, and then choose the month and date.So we've decided on June, a "not too hot, not too cold" month, full of sunshine, flowers and seabreezes. We haven't pinned down an actual date yet, but we have two in mind.
We are having a long engagement (2years) because we are young (23 and 21), but we also are recent college grads. James graduated college in 2010, and I just a few months ago, and we do have jobs (YAY!) but we need to get settled, save some money (we do have a wedding to pay for), and of course, plan our wedding! Some people are saying that we're going to push the wedding up and get married sooner because we won't want to wait that long, but we both agree that taking our time and making our wedding everything we want it to be (without going broke) will be best.
So June 2013 it is.. but if I do have two years, then why start making things and doing things now?? It is partly because I'm too impatient to wait to do things, but also the fact that we're going to be doing a lot of tasks on our own, so we need time to make them and not leave it all to the last three months before the wedding. Plus, we work, and I travel for my job a lot on the weekends. We, surprisingly, have a life, which often gets in the way of planning things, so starting early will only help us on our wedding journey!
Friday, August 26, 2011
In the beginning...
Hi, my name is Autumn, and I am... a blogger. Or at least I'm trying to be one.
I have always loved scrapbooking, crafting and DIY (do it yourself) projects. When I was in college, I started a small craft business titled "Autumn's Blossoms." I mostly made things for friends, family and my sorority sisters. I loved that each item came out differently, I loved the planning of each item, and figuring out how to implement my ideas (most of the time). I was even voted "Most Crafty" in my sorority (THANKS LADIES)!!!
As of now, I am a recent college graduate and a working girl, just trying to make a living. I don't have as much time as I would like to create things, so I figured DIY-ing my wedding would be the perfect way to get back into crafting especially because I am obsessed with weddings! The planning, the pictures, the romance, the flowers and the creativity to make it your own, but I never realized how much goes into one before I started planning my own wedding after I got engaged!
Recently, I've been having some trouble with my planning. It is so hard to decide on a style, a venue, even a season and especially make decisions that my fiance and I can agree on (mainly cause he wants it to be one big football field and serve buffalo wings). I can only talk about weddings so much with my friends, so why not do what everyone else does, and take my thoughts and publish them for the entire world to read on the internet.
Now that I'm making my way down the aisle, and have many stops to make before I say, "I do", what better way to figure things out and share my advice than making my own blog. I hope you enjoy my ideas, humor and ultimately my wedding! Buckle-up everyone, it's going to be a bumpy ride!
Subscribe to:
Comments (Atom)