So when I first moved back in with my parents, I wanted to get a desk so I can have a station for my blogging, creating and to keep myself organized. But since my room is smaller, I decided against spending the money on something I don't really have room for. BUT when things are free, how can you say no??
A few days ago, I was driving and I saw a desk on the side of the road. I pulled over, and aside from minor water damage making the sides chip off, it was in great shape! I checked it out, and tried to finagle it into my car. I have a Ford Focus, and had to leave my trunk open while I drove back to my house. While shifting it into the trunk, 11 cents fell out of a drawer, so I made money on this deal.. well, not really. I shoved it in my car and brought it home. Then, I had to go to Home Depot to pick up new wood for the sides, and as I turned off my street I thought, "Now all I need is to buy a chair" and low and behold, some person making some room in their house, and put a perfectly good chair on the curb for a lucky little DIY-er like me. The chair, had a few spider sacks, YUCK, and seriously needed a new cushion, but was perfect for my new street desk set!
I thanked the gods for shining on me and stuck the chair in my car and went on my way! Ever heard of 'ask and yee shall receive' well after I found the chair, I asked for $100, nothing. I guess it's selective grants..
So I got home, did my sanding and started painting the desk. For the chair, I decided to attempt to spray paint it instead of painting with a brush. This was going to make it go faster, especially because I'm heading deeper into December and going to run out of nice days to paint. And just like that, the sun went down, and it started to rain.
I was SO excited to find this, because I truly believe having a desk gets those creative juices flowing and I can't wait to get crafting and finish my Christmas presents, my wrapping and work on my wedding things!
Have you found anything in the street? What do you think about the importance of a desk? Do you have your own creative space??
Stay tuned, Stay crafty and Stay searching!
Wednesday, December 7, 2011

Monday, November 21, 2011
Say Yes To The Dress Application!
So I just finished my application for Say Yes To The Dress! I tried to do it a few weeks ago, but I had trouble deciding on my answers! It was really long, but fun overall!
I had to describe myself and style in three words each.. HARD. I came up with bubbly, creative and enthusiastic and interesting, colorful and individual for style. I feel like those are accurate decriptions, right? Then say why I think I would be fun to watch on TV.. EASY. Hahaha
I liked the application because it gave me a chance to reflect on what I'm looking for for a dress, think about my wedding style and opinions! Good one TLC, now just pick me for your show!!
One thing I realized that I don't have at all are traditions. We're not doing a church ceremony, and we're sort of making our own ceremony out of a mixture of different things. Then I don't have any specific articles of clothing or jewelery, so I feel like I'm missing something. James always tells me we should start our own traditions, but a part of me wishes I had a family tradition to carry on.
This week, James and I figured out some wedding things, and looked at a venue we both REALLY REALLY REALLY like. This venue doesn't have the ocean view, but we feel so strongly about it, and it fits our budget! We went to visit, and it was SO nice! Decision to be announced soon!
After we got back from the venue, we sat in the car and did this!


So what are your traditions? Do you have a certain veil to use? Are you wearing a family heirloom?? Are you forging your own route and doing things your own way? Are you going to draw moustaches on your fingers?
I had to describe myself and style in three words each.. HARD. I came up with bubbly, creative and enthusiastic and interesting, colorful and individual for style. I feel like those are accurate decriptions, right? Then say why I think I would be fun to watch on TV.. EASY. Hahaha
I liked the application because it gave me a chance to reflect on what I'm looking for for a dress, think about my wedding style and opinions! Good one TLC, now just pick me for your show!!
One thing I realized that I don't have at all are traditions. We're not doing a church ceremony, and we're sort of making our own ceremony out of a mixture of different things. Then I don't have any specific articles of clothing or jewelery, so I feel like I'm missing something. James always tells me we should start our own traditions, but a part of me wishes I had a family tradition to carry on.
This week, James and I figured out some wedding things, and looked at a venue we both REALLY REALLY REALLY like. This venue doesn't have the ocean view, but we feel so strongly about it, and it fits our budget! We went to visit, and it was SO nice! Decision to be announced soon!
After we got back from the venue, we sat in the car and did this!


So what are your traditions? Do you have a certain veil to use? Are you wearing a family heirloom?? Are you forging your own route and doing things your own way? Are you going to draw moustaches on your fingers?
Wednesday, November 16, 2011
Birthday Post, Birthday Post
You may know the song "Birthday Sex," so when reading the title of this blog, sing it to that.
Anyway, so the weigh in of my 22 before 22 goal was yesterday and, I lost 12pounds. I'm actually pretty happy with myself, 12pounds is alot, and at least I lost weight. Small steps here people. I'll keep you updated as to when I finally get to 22, and then my major milestone points along the way.
But I do need to deeply apologize for not keeping up with the posting. James and I have been very busy doing our planning, but also work has picked up tremendously. After spending 8 hours staring at a screen, it's a little difficult to bring myself to look at one at home.
But I do promise to get back into my routine of posting and I'll let you know what I was up to in my hiatus!
Stay tuned, stay crafty and stay patient =D
Anyway, so the weigh in of my 22 before 22 goal was yesterday and, I lost 12pounds. I'm actually pretty happy with myself, 12pounds is alot, and at least I lost weight. Small steps here people. I'll keep you updated as to when I finally get to 22, and then my major milestone points along the way.
But I do need to deeply apologize for not keeping up with the posting. James and I have been very busy doing our planning, but also work has picked up tremendously. After spending 8 hours staring at a screen, it's a little difficult to bring myself to look at one at home.
But I do promise to get back into my routine of posting and I'll let you know what I was up to in my hiatus!
Stay tuned, stay crafty and stay patient =D
Tuesday, October 25, 2011
Bureau Re-Fab!
First off, I want to say, I'm still at 4pounds. Only 18 to go in 21 days, I'm sticking to it!
James and I very quickly realized that we no longer have 2years to go, but am almost down to 1.5years! Crazy how time flies! Anyway, we really got down to business and got some things planned, we even chose our wedding venue and set our date!!! That's to come in a blog near you!
But to the point of this blog post:
When I moved back in with my parents, I quickly realized that my small bureau would not be enough for all my clothes/stuff. I needed a little more space, and was planning on buying a new bureau. I had a bureau I was going to throw out and never did, so my thrifty side came out and same with the nightstand, I realized I had a perfectly good piece of furniture that would do just the trick in my new, smaller space at my parents.
The lingerie chest was my aunt's, then got passed to me. Its been through a few moves, and a younger me who used to write my name on everything when I finally learned how to write. It's been through a lot and structurally is in good shape, but needed some sanding, paint and a lot of love.
Here are the before pictures of the lingerie chest, which I'll call a bureau, because I feel dirty saying lingerie that many times in a post:

 *edge has a TON of dings in it
 *The top of the bureau is lifting off and needs new screws
 *Sorry Alladin, you can have your lamp back!
*NOTE: the staples holding the back of the bureau came loose, so it needed a few new ones
See what I mean? Structurally (for the most part) great! Looking a little dated, but still in great shape, and a ton cheaper than going out and buying a whole new bureau!
For the top, I put in a few new screws and staples and done! All set for the rest of the re-fab! Now the top had some sort of formica top, which is great for resisting scratches and stains, cause it's a counter top, but not my best friend to re-paint. I used sandpaper to rough it up, then more to smooth that out a little. Overall I probably did four coats to completely cover the top.
The drawer fronts were made out of particle board, so in some spots where there was water damage, or cracks, made it difficult to sand without ruining the drawer front. The sides were a piece of cake, thank God for normal wood. Now down to the legs.. as you saw, detailed. I popped off Alladin's lamp and sent the Genie away to live in my craft bag, so I can sit on that and maybe be Princess Jasmine for Halloween, or figure out something else to do with it.. OK done with my lamp raves (for now). The legs were made out of some sort of plasticky resin, so I lightly sanded and painted, they look great!
I painted the whole thing white, and wanted to do detail in blue and gray to match the nightstand. I was going to leave the sides white and do a gray stencil, probably the second worst idea I've ever had. It was horrendous. So then, why not try blue detail, PERFECT! The drawers stayed white, but that divider on each drawer turned blue and the detail on the top drawer was the lucky winner for the stencil!
I love it!! It now looks like the nightstand and bureau are siblings and sort of look like a matching set! Here's the reveal!


TIP: Know exactly the surfaces you have to work with, and get the proper supplies, it'll save tons of time. TIP: Stay confident and don't be afraid to take on a challenge, look at these two great pieces of furniture I now have that were going to end up in a dumpster somewhere! TIP: There's nothing a few coats of paint won't fix! TIP: Look realistically at your budget and see the ways you can save even a teensy bit.
A new bureau would have cost me around $50, but re-fabbing this one, was pretty much free! I already had the paint, stencil, screws and staples so all it took was my time, which was probably like 6hours combined.
Stay tuned, stay crafty and stay thrifty (it really pays off ;])
James and I very quickly realized that we no longer have 2years to go, but am almost down to 1.5years! Crazy how time flies! Anyway, we really got down to business and got some things planned, we even chose our wedding venue and set our date!!! That's to come in a blog near you!
But to the point of this blog post:
When I moved back in with my parents, I quickly realized that my small bureau would not be enough for all my clothes/stuff. I needed a little more space, and was planning on buying a new bureau. I had a bureau I was going to throw out and never did, so my thrifty side came out and same with the nightstand, I realized I had a perfectly good piece of furniture that would do just the trick in my new, smaller space at my parents.
The lingerie chest was my aunt's, then got passed to me. Its been through a few moves, and a younger me who used to write my name on everything when I finally learned how to write. It's been through a lot and structurally is in good shape, but needed some sanding, paint and a lot of love.
Here are the before pictures of the lingerie chest, which I'll call a bureau, because I feel dirty saying lingerie that many times in a post:


*NOTE: the staples holding the back of the bureau came loose, so it needed a few new ones
See what I mean? Structurally (for the most part) great! Looking a little dated, but still in great shape, and a ton cheaper than going out and buying a whole new bureau!
For the top, I put in a few new screws and staples and done! All set for the rest of the re-fab! Now the top had some sort of formica top, which is great for resisting scratches and stains, cause it's a counter top, but not my best friend to re-paint. I used sandpaper to rough it up, then more to smooth that out a little. Overall I probably did four coats to completely cover the top.
The drawer fronts were made out of particle board, so in some spots where there was water damage, or cracks, made it difficult to sand without ruining the drawer front. The sides were a piece of cake, thank God for normal wood. Now down to the legs.. as you saw, detailed. I popped off Alladin's lamp and sent the Genie away to live in my craft bag, so I can sit on that and maybe be Princess Jasmine for Halloween, or figure out something else to do with it.. OK done with my lamp raves (for now). The legs were made out of some sort of plasticky resin, so I lightly sanded and painted, they look great!
I painted the whole thing white, and wanted to do detail in blue and gray to match the nightstand. I was going to leave the sides white and do a gray stencil, probably the second worst idea I've ever had. It was horrendous. So then, why not try blue detail, PERFECT! The drawers stayed white, but that divider on each drawer turned blue and the detail on the top drawer was the lucky winner for the stencil!
I love it!! It now looks like the nightstand and bureau are siblings and sort of look like a matching set! Here's the reveal!


TIP: Know exactly the surfaces you have to work with, and get the proper supplies, it'll save tons of time. TIP: Stay confident and don't be afraid to take on a challenge, look at these two great pieces of furniture I now have that were going to end up in a dumpster somewhere! TIP: There's nothing a few coats of paint won't fix! TIP: Look realistically at your budget and see the ways you can save even a teensy bit.
A new bureau would have cost me around $50, but re-fabbing this one, was pretty much free! I already had the paint, stencil, screws and staples so all it took was my time, which was probably like 6hours combined.
Stay tuned, stay crafty and stay thrifty (it really pays off ;])
Monday, October 17, 2011
Everybody's working for the weekend!
My First weigh in.. I lost three pounds!!!!!! Yay, only 19 more to go!
This past weekend, I got the most out of fall. James and I picked out pumpkins for us to carve and then we baked! We made cranberry pumpkin bread and honey cranberry muffins. Why cranberry? Because while we were in NH last weekend, we stopped at a precious little farm stand and bought a pint, which gave us a little more than 2cups worth of cranberries! Perfect! I got inspired and we bought the appropriate items to finish the recipes.
Now, I preferred the cranberry bread. I got the recipe off of allrecipes.com, where I usually like to get my recipes. Real people and really great recipes. You can sort them by the prep time and cost, and how easy they are to make! A great website, check it out! The honey cranberry muffins, I found on a random website. It was good, but salty.. It only called for 1 teaspoon, but it was too salty and overpowered the other flavors.
For the bread, the only additional supplies (aside from sugar, flour, etc) was a can of pumpkin, pumpkin pie spice and cranberries. It is a really nice sweet bread. Perfect for breakfast paired with a cup of coffee, while you read the paper in your pajamas, trust me, it's that good! The recipe we made, made three loaf pans worth of bread. TONS, but it's soooo yummy! We'll probably freeze one and save it for Thanksgiving or maybe even Christmas, WILD I can't believe that it's that close to the holidays!!
In addition to all these fall items, I started the re-fab of my antique bureau and started a Christmas present for my nephew. Now the present, I'm going to leave you hanging on as my sister-in-law reads my blog, and I don't want to spoil the surprise, but this is a yard sale find and is SUPER cool and I can't wait to give it and share how I re-did it.
That's all for now friends, make sure you come back soon to hear about my bureau project!
Stay tuned, stay crafty and stay cooking!
This past weekend, I got the most out of fall. James and I picked out pumpkins for us to carve and then we baked! We made cranberry pumpkin bread and honey cranberry muffins. Why cranberry? Because while we were in NH last weekend, we stopped at a precious little farm stand and bought a pint, which gave us a little more than 2cups worth of cranberries! Perfect! I got inspired and we bought the appropriate items to finish the recipes.
Now, I preferred the cranberry bread. I got the recipe off of allrecipes.com, where I usually like to get my recipes. Real people and really great recipes. You can sort them by the prep time and cost, and how easy they are to make! A great website, check it out! The honey cranberry muffins, I found on a random website. It was good, but salty.. It only called for 1 teaspoon, but it was too salty and overpowered the other flavors.
For the bread, the only additional supplies (aside from sugar, flour, etc) was a can of pumpkin, pumpkin pie spice and cranberries. It is a really nice sweet bread. Perfect for breakfast paired with a cup of coffee, while you read the paper in your pajamas, trust me, it's that good! The recipe we made, made three loaf pans worth of bread. TONS, but it's soooo yummy! We'll probably freeze one and save it for Thanksgiving or maybe even Christmas, WILD I can't believe that it's that close to the holidays!!
In addition to all these fall items, I started the re-fab of my antique bureau and started a Christmas present for my nephew. Now the present, I'm going to leave you hanging on as my sister-in-law reads my blog, and I don't want to spoil the surprise, but this is a yard sale find and is SUPER cool and I can't wait to give it and share how I re-did it.
That's all for now friends, make sure you come back soon to hear about my bureau project!
Stay tuned, stay crafty and stay cooking!
Tuesday, October 11, 2011
22 before 22
I'm sorry, so sorry. I left you stranded with no notice, for a week. No ideas of what to look forward to, no ideas to ponder, nothing. I'm truly sorry. Work has taken a turn for BUSY and I've been a little preoccupied. Plus, Columbus Day came and my family has a tradition of vacationing in New Hampshire, so that is where I was Friday afternoon to last night.
But anyway here's what my busy little brain has been working on!
In preparation for my wedding, I need to get skin-nayyyyy to look awesome in my dress, pictures not to mention all the wedding festivities (shower, bachelorette party, honeymoons.. Hey, I can dream can't I?). So many reasons, aside from increasing my life expectancy, health, and all those other boring things. Oh, and extra motivation, one of my brothers is renewing his vows with his wife in September 2012, and another brother (I have three total, you'll hear about the last one later) is getting married for real in December, and then my wedding is June! Holy Nuptuals, I'm going to be wedding-ed out!
Back to the point: James and I will be taking our save the dates in June 2012, so I'm thinking of trying to lose the majority of what I want to lose before our engagement pictures for the save the dates. That way I don't have to stress myself out even more about looking phenomenal on top of all the other wedding things to get done. James is joining me in this plan and is going to get fit too! I'm totally ready to start my wedding weight loss journey so we can start our life together (so corny, I know, but couldn't resist)!
So to kick it all off, I want to try and lose 22 pounds before I turn 22! The terms are simple, lose 22 pounds before November 15, 2011. My final weigh in will be the morning of my birthday. If I lose more than 22 (aiming high!!) then I will continue and hope to lose 25, 30 and increase it after that (again if, and I'm aiming high here). I started this 22 before 22 campaign last Wednesday, so my first weigh in will be tomorrow, EEK!
What are your wedding weight loss goals? Do you have any special occasions coming up that you want to get fit for? Wanna join me in my 22 before I'm 22 campaign? Is your fiance joining you in your weight loss journey?
Stay tuned, stay crafty, and stay dieting!! Wish me luck!
But anyway here's what my busy little brain has been working on!
In preparation for my wedding, I need to get skin-nayyyyy to look awesome in my dress, pictures not to mention all the wedding festivities (shower, bachelorette party, honeymoons.. Hey, I can dream can't I?). So many reasons, aside from increasing my life expectancy, health, and all those other boring things. Oh, and extra motivation, one of my brothers is renewing his vows with his wife in September 2012, and another brother (I have three total, you'll hear about the last one later) is getting married for real in December, and then my wedding is June! Holy Nuptuals, I'm going to be wedding-ed out!
Back to the point: James and I will be taking our save the dates in June 2012, so I'm thinking of trying to lose the majority of what I want to lose before our engagement pictures for the save the dates. That way I don't have to stress myself out even more about looking phenomenal on top of all the other wedding things to get done. James is joining me in this plan and is going to get fit too! I'm totally ready to start my wedding weight loss journey so we can start our life together (so corny, I know, but couldn't resist)!
So to kick it all off, I want to try and lose 22 pounds before I turn 22! The terms are simple, lose 22 pounds before November 15, 2011. My final weigh in will be the morning of my birthday. If I lose more than 22 (aiming high!!) then I will continue and hope to lose 25, 30 and increase it after that (again if, and I'm aiming high here). I started this 22 before 22 campaign last Wednesday, so my first weigh in will be tomorrow, EEK!
What are your wedding weight loss goals? Do you have any special occasions coming up that you want to get fit for? Wanna join me in my 22 before I'm 22 campaign? Is your fiance joining you in your weight loss journey?
Stay tuned, stay crafty, and stay dieting!! Wish me luck!
Sunday, October 2, 2011
Nightstand Re-Fab: Part Three
It's FINALLY done! It took me a week, just 7 teensy days to revamp the entire thing. I feel like it took SO long, just because I had to brainstorm a ton for it, execute and make sure it looked good!
So the finishing touches: add on the handle, and paint the details, and design the edges. Easy right? NO! Well reattaching the handle was..
Here are the pictures with the 2nd coat of paint on and what I started with for the night.


So first, I painted the drawer edging blue, I did use tape for this part. Here, the tape worked great, especially because the curves in the wood made it a little difficult.
Then I painted the edges of the detailed section blue, and I decided to paint the edge of the legs to make them stand out a little more in the same color. I did use tape one on leg, but the amount of time it took compared to how impatient I am wasn't worth it. Plus, not having a ton of paint on the brush and using a small artist's brush was just what I needed! After I painted one edge of the leg, I realized I needed to paint the other because it didn't look right otherwise.
I also decided to paint the edge of the surface (again in blue) to make it pop a little more, and I think it really looks awesome!
So now for the detailed sections:
Going with my new bedding, I decided to paint the soon to be fabulous section gray. I bought a stencil at Michael's and wanted to put it on the detail of the nightstand. So I cut the section of the stencil I wanted, and used painter's tape to place it where I was going to paint it. Then I took a dobbing brush and painted blue over the stencil.
 Then moved over to the other side, this one I messed up a little, painted outside the lines. I tried to wipe it off quick, but that chipped the gray paint, so I had to re-paint it all together (did I mention I'm impatient?)I used a wet paper towel to wipe off the paint and then a dry one to.. dry it.
So both sides are stenciled and all the edges are painted! I went back over each area, and if I smudged paint, I took a wet paper towel and sort of rubbed it off (the beauty of using gloss paint). Don't rub too hard otherwise you'll take off the base coat.
Are you ready? Cause here it is. You've been good, so I think you're desrving of this masterpiece.. So yup, Here is the finished product!!!!


Here's the before before picture:

What a difference!!!
I'm officially obsessed with it! I almost packed it up in my car and took it to work to proudly display in my cube for the office to see. I LOVE IT!! AND it matches the headboard SO well and is so pretty! I think it is adulty, and will work in James and my bedroom (when we get one) and I just want to cuddle with it because I'm a proud mom of a nightstand!
So total cost breakdown:
$1.58 lemons
$6.43 stencil (on sale and a coupon!)
$2.12 dobbing brush (on sale and a coupon!)
$3.20 gray sample paint
Total cost: $13.33!!!!!! For an antique nightstand! What a deal!
So here are my tips-
TIP: Painting tape is great, but I was too impatient and excited to use it. But it's also not perfect for deep crevices or curves (which is what I was working with).
TIP: For those small/detailed areas, use a small brush and sparing paint. Having to much causes globs and it's easier to do a second coat than to have to sand, strip and start the process all over again.
TIP: Get an idea of what your goals are for the project. Your creative juices will get flowing and more will come to you, so be open and try it, and if you don't like it, you can always start over.
TIP: Don't rush, take your time with every step. You'll thank yourself later!
I'm so happy that this is my first flip! I'm so proud of myself for completing this, and especially in just a week! I think this was a great stepping stone to bigger and more intimidating projects, but I'm ready to take on any challenge now, and I think I have the perfect thing to start next!
Stay tuned, stay crafty and stay confident!
So the finishing touches: add on the handle, and paint the details, and design the edges. Easy right? NO! Well reattaching the handle was..
Here are the pictures with the 2nd coat of paint on and what I started with for the night.

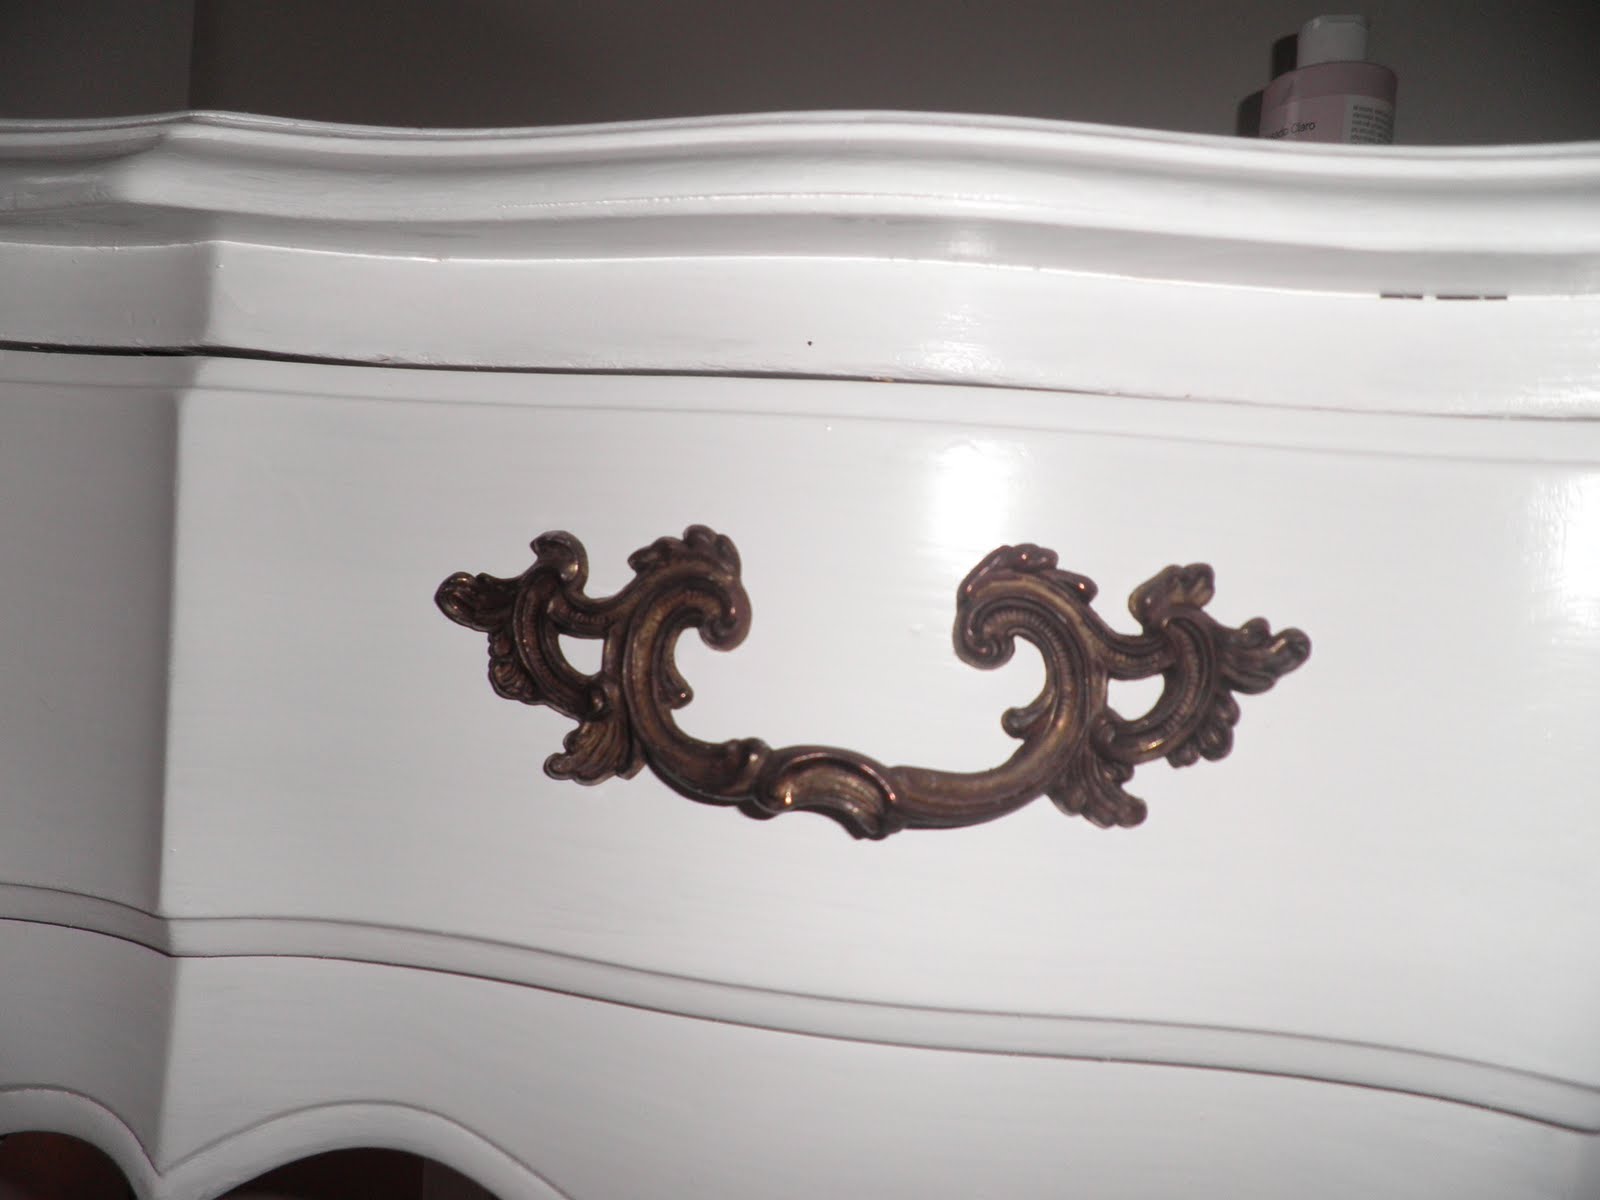
So first, I painted the drawer edging blue, I did use tape for this part. Here, the tape worked great, especially because the curves in the wood made it a little difficult.
Then I painted the edges of the detailed section blue, and I decided to paint the edge of the legs to make them stand out a little more in the same color. I did use tape one on leg, but the amount of time it took compared to how impatient I am wasn't worth it. Plus, not having a ton of paint on the brush and using a small artist's brush was just what I needed! After I painted one edge of the leg, I realized I needed to paint the other because it didn't look right otherwise.
I also decided to paint the edge of the surface (again in blue) to make it pop a little more, and I think it really looks awesome!
So now for the detailed sections:
Going with my new bedding, I decided to paint the soon to be fabulous section gray. I bought a stencil at Michael's and wanted to put it on the detail of the nightstand. So I cut the section of the stencil I wanted, and used painter's tape to place it where I was going to paint it. Then I took a dobbing brush and painted blue over the stencil.

So both sides are stenciled and all the edges are painted! I went back over each area, and if I smudged paint, I took a wet paper towel and sort of rubbed it off (the beauty of using gloss paint). Don't rub too hard otherwise you'll take off the base coat.
Are you ready? Cause here it is. You've been good, so I think you're desrving of this masterpiece.. So yup, Here is the finished product!!!!


Here's the before before picture:

What a difference!!!
I'm officially obsessed with it! I almost packed it up in my car and took it to work to proudly display in my cube for the office to see. I LOVE IT!! AND it matches the headboard SO well and is so pretty! I think it is adulty, and will work in James and my bedroom (when we get one) and I just want to cuddle with it because I'm a proud mom of a nightstand!
So total cost breakdown:
$1.58 lemons
$6.43 stencil (on sale and a coupon!)
$2.12 dobbing brush (on sale and a coupon!)
$3.20 gray sample paint
Total cost: $13.33!!!!!! For an antique nightstand! What a deal!
So here are my tips-
TIP: Painting tape is great, but I was too impatient and excited to use it. But it's also not perfect for deep crevices or curves (which is what I was working with).
TIP: For those small/detailed areas, use a small brush and sparing paint. Having to much causes globs and it's easier to do a second coat than to have to sand, strip and start the process all over again.
TIP: Get an idea of what your goals are for the project. Your creative juices will get flowing and more will come to you, so be open and try it, and if you don't like it, you can always start over.
TIP: Don't rush, take your time with every step. You'll thank yourself later!
I'm so happy that this is my first flip! I'm so proud of myself for completing this, and especially in just a week! I think this was a great stepping stone to bigger and more intimidating projects, but I'm ready to take on any challenge now, and I think I have the perfect thing to start next!
Stay tuned, stay crafty and stay confident!
Subscribe to:
Posts (Atom)