So when I first moved back in with my parents, I wanted to get a desk so I can have a station for my blogging, creating and to keep myself organized. But since my room is smaller, I decided against spending the money on something I don't really have room for. BUT when things are free, how can you say no??
A few days ago, I was driving and I saw a desk on the side of the road. I pulled over, and aside from minor water damage making the sides chip off, it was in great shape! I checked it out, and tried to finagle it into my car. I have a Ford Focus, and had to leave my trunk open while I drove back to my house. While shifting it into the trunk, 11 cents fell out of a drawer, so I made money on this deal.. well, not really. I shoved it in my car and brought it home. Then, I had to go to Home Depot to pick up new wood for the sides, and as I turned off my street I thought, "Now all I need is to buy a chair" and low and behold, some person making some room in their house, and put a perfectly good chair on the curb for a lucky little DIY-er like me. The chair, had a few spider sacks, YUCK, and seriously needed a new cushion, but was perfect for my new street desk set!
I thanked the gods for shining on me and stuck the chair in my car and went on my way! Ever heard of 'ask and yee shall receive' well after I found the chair, I asked for $100, nothing. I guess it's selective grants..
So I got home, did my sanding and started painting the desk. For the chair, I decided to attempt to spray paint it instead of painting with a brush. This was going to make it go faster, especially because I'm heading deeper into December and going to run out of nice days to paint. And just like that, the sun went down, and it started to rain.
I was SO excited to find this, because I truly believe having a desk gets those creative juices flowing and I can't wait to get crafting and finish my Christmas presents, my wrapping and work on my wedding things!
Have you found anything in the street? What do you think about the importance of a desk? Do you have your own creative space??
Stay tuned, Stay crafty and Stay searching!
Showing posts with label DIY. Show all posts
Showing posts with label DIY. Show all posts
Wednesday, December 7, 2011

Sunday, October 2, 2011
Nightstand Re-Fab: Part Three
It's FINALLY done! It took me a week, just 7 teensy days to revamp the entire thing. I feel like it took SO long, just because I had to brainstorm a ton for it, execute and make sure it looked good!
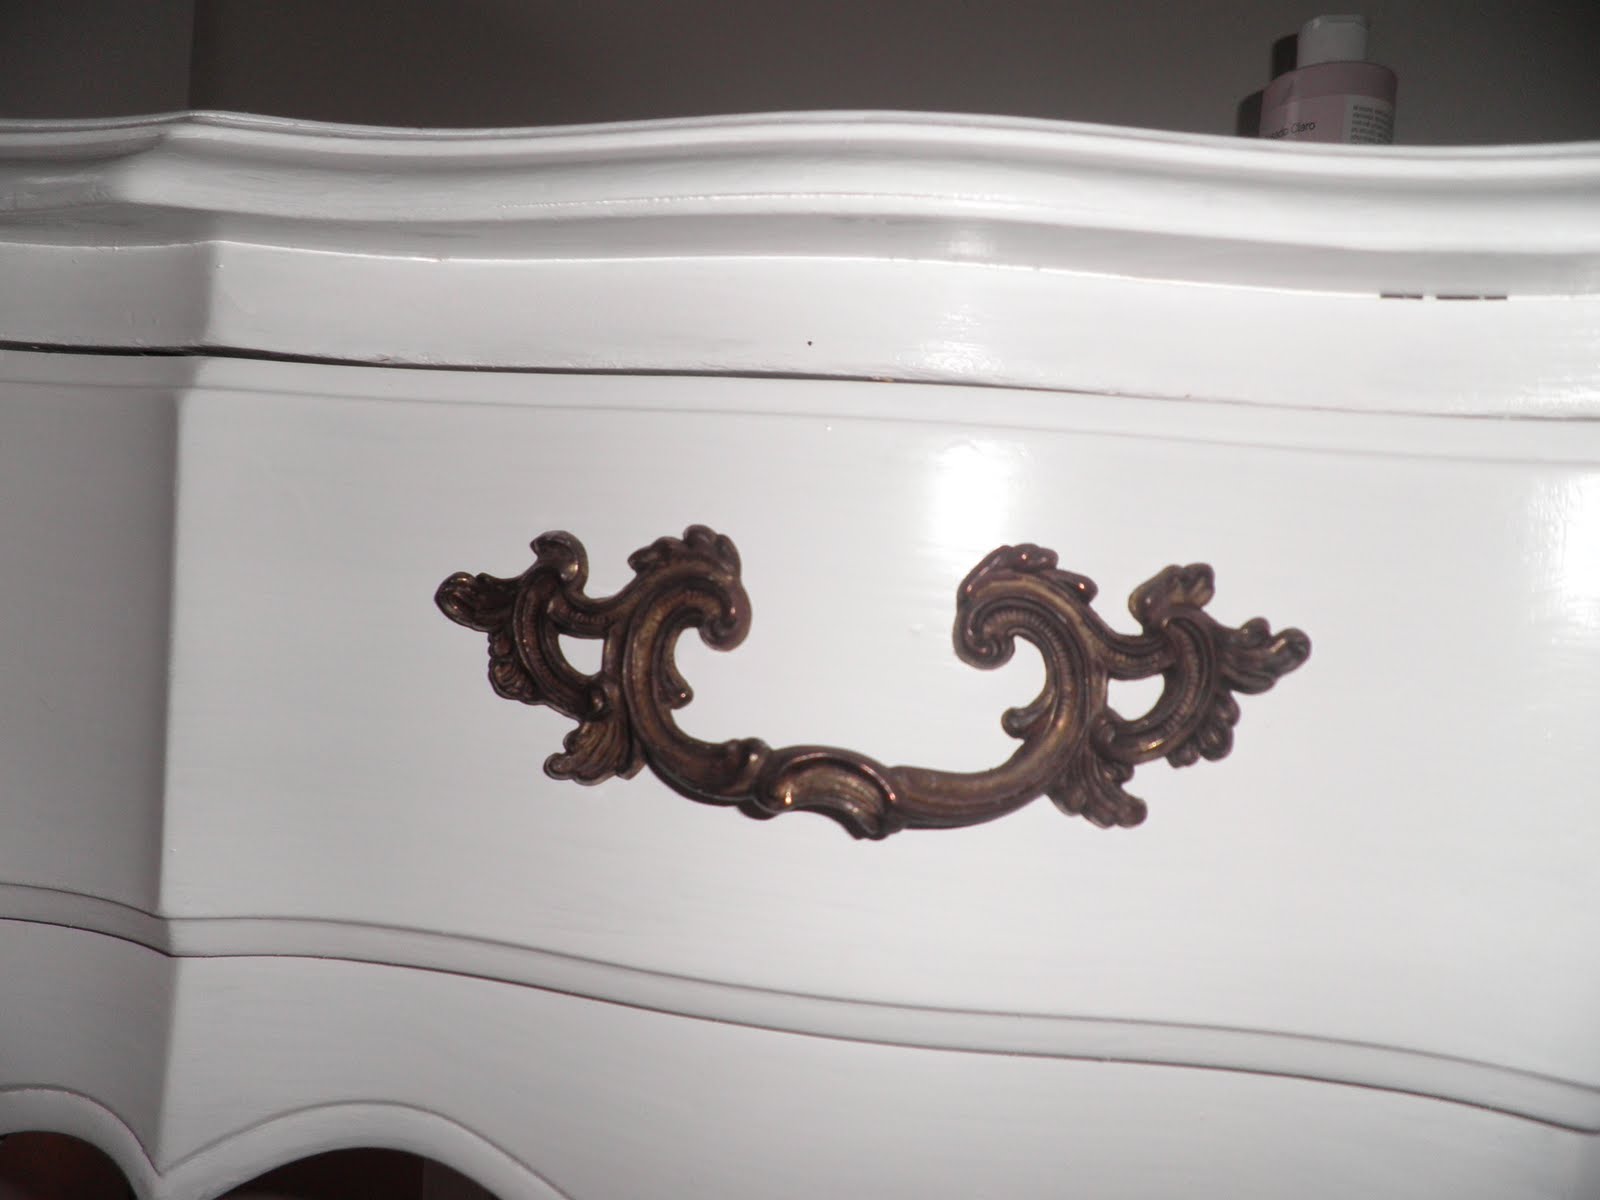
So the finishing touches: add on the handle, and paint the details, and design the edges. Easy right? NO! Well reattaching the handle was..
Here are the pictures with the 2nd coat of paint on and what I started with for the night.


So first, I painted the drawer edging blue, I did use tape for this part. Here, the tape worked great, especially because the curves in the wood made it a little difficult.
Then I painted the edges of the detailed section blue, and I decided to paint the edge of the legs to make them stand out a little more in the same color. I did use tape one on leg, but the amount of time it took compared to how impatient I am wasn't worth it. Plus, not having a ton of paint on the brush and using a small artist's brush was just what I needed! After I painted one edge of the leg, I realized I needed to paint the other because it didn't look right otherwise.
I also decided to paint the edge of the surface (again in blue) to make it pop a little more, and I think it really looks awesome!
So now for the detailed sections:
Going with my new bedding, I decided to paint the soon to be fabulous section gray. I bought a stencil at Michael's and wanted to put it on the detail of the nightstand. So I cut the section of the stencil I wanted, and used painter's tape to place it where I was going to paint it. Then I took a dobbing brush and painted blue over the stencil.
 Then moved over to the other side, this one I messed up a little, painted outside the lines. I tried to wipe it off quick, but that chipped the gray paint, so I had to re-paint it all together (did I mention I'm impatient?)I used a wet paper towel to wipe off the paint and then a dry one to.. dry it.
So both sides are stenciled and all the edges are painted! I went back over each area, and if I smudged paint, I took a wet paper towel and sort of rubbed it off (the beauty of using gloss paint). Don't rub too hard otherwise you'll take off the base coat.
Are you ready? Cause here it is. You've been good, so I think you're desrving of this masterpiece.. So yup, Here is the finished product!!!!


Here's the before before picture:

What a difference!!!
I'm officially obsessed with it! I almost packed it up in my car and took it to work to proudly display in my cube for the office to see. I LOVE IT!! AND it matches the headboard SO well and is so pretty! I think it is adulty, and will work in James and my bedroom (when we get one) and I just want to cuddle with it because I'm a proud mom of a nightstand!
So total cost breakdown:
$1.58 lemons
$6.43 stencil (on sale and a coupon!)
$2.12 dobbing brush (on sale and a coupon!)
$3.20 gray sample paint
Total cost: $13.33!!!!!! For an antique nightstand! What a deal!
So here are my tips-
TIP: Painting tape is great, but I was too impatient and excited to use it. But it's also not perfect for deep crevices or curves (which is what I was working with).
TIP: For those small/detailed areas, use a small brush and sparing paint. Having to much causes globs and it's easier to do a second coat than to have to sand, strip and start the process all over again.
TIP: Get an idea of what your goals are for the project. Your creative juices will get flowing and more will come to you, so be open and try it, and if you don't like it, you can always start over.
TIP: Don't rush, take your time with every step. You'll thank yourself later!
I'm so happy that this is my first flip! I'm so proud of myself for completing this, and especially in just a week! I think this was a great stepping stone to bigger and more intimidating projects, but I'm ready to take on any challenge now, and I think I have the perfect thing to start next!
Stay tuned, stay crafty and stay confident!
So the finishing touches: add on the handle, and paint the details, and design the edges. Easy right? NO! Well reattaching the handle was..
Here are the pictures with the 2nd coat of paint on and what I started with for the night.

So first, I painted the drawer edging blue, I did use tape for this part. Here, the tape worked great, especially because the curves in the wood made it a little difficult.
Then I painted the edges of the detailed section blue, and I decided to paint the edge of the legs to make them stand out a little more in the same color. I did use tape one on leg, but the amount of time it took compared to how impatient I am wasn't worth it. Plus, not having a ton of paint on the brush and using a small artist's brush was just what I needed! After I painted one edge of the leg, I realized I needed to paint the other because it didn't look right otherwise.
I also decided to paint the edge of the surface (again in blue) to make it pop a little more, and I think it really looks awesome!
So now for the detailed sections:
Going with my new bedding, I decided to paint the soon to be fabulous section gray. I bought a stencil at Michael's and wanted to put it on the detail of the nightstand. So I cut the section of the stencil I wanted, and used painter's tape to place it where I was going to paint it. Then I took a dobbing brush and painted blue over the stencil.

So both sides are stenciled and all the edges are painted! I went back over each area, and if I smudged paint, I took a wet paper towel and sort of rubbed it off (the beauty of using gloss paint). Don't rub too hard otherwise you'll take off the base coat.
Are you ready? Cause here it is. You've been good, so I think you're desrving of this masterpiece.. So yup, Here is the finished product!!!!


Here's the before before picture:

What a difference!!!
I'm officially obsessed with it! I almost packed it up in my car and took it to work to proudly display in my cube for the office to see. I LOVE IT!! AND it matches the headboard SO well and is so pretty! I think it is adulty, and will work in James and my bedroom (when we get one) and I just want to cuddle with it because I'm a proud mom of a nightstand!
So total cost breakdown:
$1.58 lemons
$6.43 stencil (on sale and a coupon!)
$2.12 dobbing brush (on sale and a coupon!)
$3.20 gray sample paint
Total cost: $13.33!!!!!! For an antique nightstand! What a deal!
So here are my tips-
TIP: Painting tape is great, but I was too impatient and excited to use it. But it's also not perfect for deep crevices or curves (which is what I was working with).
TIP: For those small/detailed areas, use a small brush and sparing paint. Having to much causes globs and it's easier to do a second coat than to have to sand, strip and start the process all over again.
TIP: Get an idea of what your goals are for the project. Your creative juices will get flowing and more will come to you, so be open and try it, and if you don't like it, you can always start over.
TIP: Don't rush, take your time with every step. You'll thank yourself later!
I'm so happy that this is my first flip! I'm so proud of myself for completing this, and especially in just a week! I think this was a great stepping stone to bigger and more intimidating projects, but I'm ready to take on any challenge now, and I think I have the perfect thing to start next!
Stay tuned, stay crafty and stay confident!
Tuesday, September 27, 2011
Headboard and Hardwork!
In my quest to re-do my room, I decided I needed to re-cover the fabric headboard I have. My parents made it for me (see where I get my crafty-ness from?) when they re-did my room when I was 12. It looked great, but the fabric isn't really matching anything I'm going for now, plus it's old, a little ripped and it's just time for a change.. hence my whole room re-decoration project!
Here's the before picture!

Now I had help from my parents, which I'm grateful for. I had my ideas about how I was going to recover it, but their experience with the fabric headboard helped. I started ripping off the fabric, but it turned out that the fabric I bought could go right over the old, and you can't see it at all! Perfect cause ripping off the old fabric was a total pain in the.. you know where. Now, I was going tack on the new fabric from the bottom, and then do the two sides and finish with the top. It was easier to do the sides, so that way the pattern can be set straight on the headboard. Then I did the bottom and doing the top last worked great so I can fix any wrinkles, bunches, whatever.
TIP: Find a thick fabric, using upholstery would be best! This will hold together all the badding, but also hold up against the wear and tear it'll go through. TIP: Try using an industrial stapler, you need something that will go into the wood and hold it all together. A hammertack was too much to try and swing it while holding the headboard. It proved to be a dangerous situation. TIP: Lay it out across the front and try to make sure the pattern (if any) is straight, or how ever you want it.
Now to the top. Because of the heart shape, it was pretty hard for me to love this project. Also I was facing the back the whole time, so I couldn't see my work coming together but that also made the reveal even better!
Anyway. It was pretty difficult to get the fabric smoothed out over curve and not have it bunch together in the center. So I tacked the top of each curve, then snipped the fabric at the center and stapled it from the top of each curve and worked inward. Then did the top out to the corner.
This was pretty time consuming, and I definitely worked up a sweat! It was a ton of lifting, moving, smoothing, restapling, just a lot of hard and tedious work! But here's the finished product!

I LOVE IT! I think it looks really soothing and calm, and I just can't wait to make my bed and lay down and look at it day in and day out! I think it's very adulty, but also it's not too feminine so when James and I move in together, we'll be good, and I won't have to go through this again!
Stay Tuned, Stay Crafty and Stay Inspired.
Here's the before picture!

Now I had help from my parents, which I'm grateful for. I had my ideas about how I was going to recover it, but their experience with the fabric headboard helped. I started ripping off the fabric, but it turned out that the fabric I bought could go right over the old, and you can't see it at all! Perfect cause ripping off the old fabric was a total pain in the.. you know where. Now, I was going tack on the new fabric from the bottom, and then do the two sides and finish with the top. It was easier to do the sides, so that way the pattern can be set straight on the headboard. Then I did the bottom and doing the top last worked great so I can fix any wrinkles, bunches, whatever.
TIP: Find a thick fabric, using upholstery would be best! This will hold together all the badding, but also hold up against the wear and tear it'll go through. TIP: Try using an industrial stapler, you need something that will go into the wood and hold it all together. A hammertack was too much to try and swing it while holding the headboard. It proved to be a dangerous situation. TIP: Lay it out across the front and try to make sure the pattern (if any) is straight, or how ever you want it.
Now to the top. Because of the heart shape, it was pretty hard for me to love this project. Also I was facing the back the whole time, so I couldn't see my work coming together but that also made the reveal even better!
Anyway. It was pretty difficult to get the fabric smoothed out over curve and not have it bunch together in the center. So I tacked the top of each curve, then snipped the fabric at the center and stapled it from the top of each curve and worked inward. Then did the top out to the corner.
This was pretty time consuming, and I definitely worked up a sweat! It was a ton of lifting, moving, smoothing, restapling, just a lot of hard and tedious work! But here's the finished product!

I LOVE IT! I think it looks really soothing and calm, and I just can't wait to make my bed and lay down and look at it day in and day out! I think it's very adulty, but also it's not too feminine so when James and I move in together, we'll be good, and I won't have to go through this again!
Stay Tuned, Stay Crafty and Stay Inspired.
Wednesday, September 21, 2011
Nightstand Re-Fab: Part One
I was in such a foul mood all day. All I wanted to do was come home and lay down in the dark and sleep the night away. Why? I have no idea. Just middle of the week slump I guess. I wanted to go to the gym, but my bad mood threw that idea out the fitness window. I didn't want to waste my evening, so I decided to get a jump start on re-fabbing (re-fabulous-ing, new term, its probably the next big thing) a part of my bedroom beautification on a budget.
So the task, taking a nightstand that was my part of mom's bedroom set from when she was little and re-finishing it to go with my new room.
Here are the before pictures, it is a brown/gold, that turned green over time.. The paint started chipping and lifting in certain spots.
 **Note my cat laying underneath the nightstand =D

Step One, Sanding. I have never sandedanything before, well I have, but nothing this intense or that I actually cared about working on. I had some help and advice from my dad on this one, which I am extremely grateful for. I took off the hardware for the drawer, which I will have to soak to get the rust off, but also I had to remove the wooden applique. One of them fell off during the move, and when I was taking the other off, it cracked. So rather than being able to save it for another project, it is beyond repair and in the big workshop in the sky. Now, when you start sanding something, start with the coursest sandpaper, and work your way to the finest piece. This will help get the last coat of paint or finish off, and then work the item down to getting a better paint job on the piece in the end. TIP: I recommend working outside, so the dust doesn't consume the inside of your home. TIP: I recommend using something firm to wrap the sand paper around, a block would work, to use for the edging or small cracks and crevises, otherwise your fingers will be killing you.. lesson learned =/
Progress pictures


Step Two, Painting. I've never painted a piece of furniture this detailed, but it wasn't that bad. TIP: Make sure you clean off all the dust before you start painting, using a wet cloth will work best. TIP: Taking long strokes, and not having a ton of paint on the brush made it a little easier to paint all the detail. This way there weren't any globs or drips that you'll have to go back and sand then paint over later.
Also, make sure there is enough lighting whereever you're painting, this way you'll be able to tell the spots you miss to get a better job done the first time around. Also, make sure everything is smooth and the paint it even on the surfaces.
I'm still working on the second coat but here is the nightstand of of now:


Still left to do: Second coat of paint, figure out how to get the rust off the hardware for the drawer and potentially figure out a new detail for the corners.
I don't know why, but just focusing on a project and letting all your frustration out was a great stress release, and now, I'm in a great mood! I'm really excited to finish the nightstand and see how the final product turns out!
Stay crafty, stay happy and stay tuned!
So the task, taking a nightstand that was my part of mom's bedroom set from when she was little and re-finishing it to go with my new room.
Here are the before pictures, it is a brown/gold, that turned green over time.. The paint started chipping and lifting in certain spots.


Step One, Sanding. I have never sanded
Progress pictures


Step Two, Painting. I've never painted a piece of furniture this detailed, but it wasn't that bad. TIP: Make sure you clean off all the dust before you start painting, using a wet cloth will work best. TIP: Taking long strokes, and not having a ton of paint on the brush made it a little easier to paint all the detail. This way there weren't any globs or drips that you'll have to go back and sand then paint over later.
Also, make sure there is enough lighting whereever you're painting, this way you'll be able to tell the spots you miss to get a better job done the first time around. Also, make sure everything is smooth and the paint it even on the surfaces.
I'm still working on the second coat but here is the nightstand of of now:


Still left to do: Second coat of paint, figure out how to get the rust off the hardware for the drawer and potentially figure out a new detail for the corners.
I don't know why, but just focusing on a project and letting all your frustration out was a great stress release, and now, I'm in a great mood! I'm really excited to finish the nightstand and see how the final product turns out!
Stay crafty, stay happy and stay tuned!
Monday, September 19, 2011
No Rest for the Wicked.
The moving verdict. I'm moving back in with my parents to save some money. I really want to be out on my own, but I think right now, it is smarter for James and I to live with our parents, and save for a home of our own. So.. I've become minorly obsessed with redoing my room and re-furbing the furniture I have that has been in storage for several months, and making over my bedroom so it look more 'adulty' but also, this way we'll have things for when we move in together.
On Saturday, I had a whole list of To-Do, to do. I started out by running a few errands and the last stop on my list was to make a trip to the bank, and on my way I stumbled upon some lovely yard sales! Now, I love a good yard sale, and by love, I mean head over heels, L-O-V-E yard sales. Plenty of weird stuff you don't really need but for some reason want to buy, walking through the maze of tables on a front lawn, listening to the people try and barter with the host and the best part, getting great deals.
My yard sale experience was successful. I found a few pieces we can use for our centerpieces (details to come in a blog near you), but I also found a few real treats!
I got this baby for $10!!

and this was still in it's wrapping from Kohls, originally priced at $29.99, I got it for $3!!

So all I had to do was pack them in my car, and take them home!
So after I finished hitting the sales, I went to Home Depot got some paint and a bigger paintbrush, I touched up the paint on both items, and voila!!! I also threw a new coat of paint onto my bookcase from when I was a little kid (which desperately needed it).
and here's my after picture!!

Here is my cost breakdown:
Bookcase $0 (already had), normal cost $50
Paint (semi-gloss interior white) $11
Paintbrush $3
Mirror $10, normal cost $40
Frame $3, normal cost $30
So in total, I spent $27, when to buy it all brand new would have cost over $120, talk about Extreme Deal-finding!!!!
All in all, saturday was a successful errand day, with a few added bonuses. I'm really pumped about my new items, and ready to take the plunge to move back in with my parents.
SPOILER ALERT: I ALSO painted an initial coat on an upcoming project I'm still in the middle of working on. Hopefully I'll finish that sometime this week.
SPOILER, PART TWO: I made my plan on re-finishing a nightstand that used to be my mom's when she was a kid. Super fun and full of DIY flare!
SPOILER, PART THREE: Tonight (Monday) I spent an hour at Joann's Fabric for yet another project on my to-do list
So here are some lessons I learned this weekend:
TIP: Don't get snobby, and if there is something in particular you're looking for, check out your local Goodwill/Salvation Army/Yard Sales/etc. You can find great pieces, at awesome prices. Most of the time, the things just need a little love (and lysol) and you're good to go!
TIP: For more detailed items, use a smaller paint brush, but for big things (bookcases, bureaus, etc) splurge and save yourself (and your back) the pain!
TIP: Don't sell yourself short, you can do it! Just take your time and pay attention and you'll be able to re-fab (short for re-fabulous) anything! But also, you can do it on a limited budget!
Stay tuned, stay crafty and stay inspired!
On Saturday, I had a whole list of To-Do, to do. I started out by running a few errands and the last stop on my list was to make a trip to the bank, and on my way I stumbled upon some lovely yard sales! Now, I love a good yard sale, and by love, I mean head over heels, L-O-V-E yard sales. Plenty of weird stuff you don't really need but for some reason want to buy, walking through the maze of tables on a front lawn, listening to the people try and barter with the host and the best part, getting great deals.
My yard sale experience was successful. I found a few pieces we can use for our centerpieces (details to come in a blog near you), but I also found a few real treats!
I got this baby for $10!!

and this was still in it's wrapping from Kohls, originally priced at $29.99, I got it for $3!!

So all I had to do was pack them in my car, and take them home!
So after I finished hitting the sales, I went to Home Depot got some paint and a bigger paintbrush, I touched up the paint on both items, and voila!!! I also threw a new coat of paint onto my bookcase from when I was a little kid (which desperately needed it).
and here's my after picture!!

Here is my cost breakdown:
Bookcase $0 (already had), normal cost $50
Paint (semi-gloss interior white) $11
Paintbrush $3
Mirror $10, normal cost $40
Frame $3, normal cost $30
So in total, I spent $27, when to buy it all brand new would have cost over $120, talk about Extreme Deal-finding!!!!
All in all, saturday was a successful errand day, with a few added bonuses. I'm really pumped about my new items, and ready to take the plunge to move back in with my parents.
SPOILER ALERT: I ALSO painted an initial coat on an upcoming project I'm still in the middle of working on. Hopefully I'll finish that sometime this week.
SPOILER, PART TWO: I made my plan on re-finishing a nightstand that used to be my mom's when she was a kid. Super fun and full of DIY flare!
SPOILER, PART THREE: Tonight (Monday) I spent an hour at Joann's Fabric for yet another project on my to-do list
So here are some lessons I learned this weekend:
TIP: Don't get snobby, and if there is something in particular you're looking for, check out your local Goodwill/Salvation Army/Yard Sales/etc. You can find great pieces, at awesome prices. Most of the time, the things just need a little love (and lysol) and you're good to go!
TIP: For more detailed items, use a smaller paint brush, but for big things (bookcases, bureaus, etc) splurge and save yourself (and your back) the pain!
TIP: Don't sell yourself short, you can do it! Just take your time and pay attention and you'll be able to re-fab (short for re-fabulous) anything! But also, you can do it on a limited budget!
Stay tuned, stay crafty and stay inspired!
Sunday, September 18, 2011
MyMemories Software
Ahhhhh Sunday Morning.. laying in bed, with nothing on my agenda for the day, except to create. What a beautiful to do list to have!
What was your first Craft Project? A decorated picture frame? Re-finishing an old piece of furniture? I started out scrapbooking, the gateway craft which started my addiction for crafting. Have you tried it? Careful, it will consume you.
The only thing about scrapbooking, is it takes a lot of time and money. The supplies (pictures, stickers, papers, glue, etc) really add up, plus planning each page and the album in whole! This is why my scrapbooking has been put on the back burner, until now! I found My Memories scrapbooking software, and this is something really great! It's a digital software, where you can make as many albums as you like, decorate them however you want and share everything you make with your friends and family!!
Now, I love technology, but I am still old fashioned and don't like to do things online. So I was skeptical about how I would like the software, or how user friendly it is (cause I'm not very tech-savvy). I didn't need any directions, although I would have appreciated some information about all the features it has. The software is very open, so your creativity can flow through your fingers to the new albums you're making!
There are so many options so it's really versatile for any occasion you might be scrapbooking for! Grandma's birthday? Your niece's 1st birthday? Family trips to Bermuda? YES, YES, and YES! You can begin by choosing a template, or customize your own. You are able to add your own texts, embellishments, ribbons, and add the pictures you have on your computer, with out uploading or having to resize them! The best part, I think is, you can print each page you make, but also the software gives you margins to stay within so if you do print it, none of your creation will be cut off!
It's SO easy to use, and is really a great asset for scrapbookers everywhere.
Would you like to WIN a FREE copy of this software???????? If you fiddle around on www.mymemories.com, and comment below about your favorite background, or template, and comment on this blog post which one is your favorite, you'll be entered to win a FREE copy!!!!
I made an album to share the pictures from the day we got engaged!!


Want to buy a copy? Visit http://www.mymemories.com/digital_scrapbooking_software to buy your own, and use this code: STMMMS16888 to save money on your order!!!
I've already made three albums in 2hours, and I haven't had ANY coffee yet!! So get creative and get excited to win your own My Memories Software!!
What was your first Craft Project? A decorated picture frame? Re-finishing an old piece of furniture? I started out scrapbooking, the gateway craft which started my addiction for crafting. Have you tried it? Careful, it will consume you.
The only thing about scrapbooking, is it takes a lot of time and money. The supplies (pictures, stickers, papers, glue, etc) really add up, plus planning each page and the album in whole! This is why my scrapbooking has been put on the back burner, until now! I found My Memories scrapbooking software, and this is something really great! It's a digital software, where you can make as many albums as you like, decorate them however you want and share everything you make with your friends and family!!
Now, I love technology, but I am still old fashioned and don't like to do things online. So I was skeptical about how I would like the software, or how user friendly it is (cause I'm not very tech-savvy). I didn't need any directions, although I would have appreciated some information about all the features it has. The software is very open, so your creativity can flow through your fingers to the new albums you're making!
There are so many options so it's really versatile for any occasion you might be scrapbooking for! Grandma's birthday? Your niece's 1st birthday? Family trips to Bermuda? YES, YES, and YES! You can begin by choosing a template, or customize your own. You are able to add your own texts, embellishments, ribbons, and add the pictures you have on your computer, with out uploading or having to resize them! The best part, I think is, you can print each page you make, but also the software gives you margins to stay within so if you do print it, none of your creation will be cut off!
It's SO easy to use, and is really a great asset for scrapbookers everywhere.
Would you like to WIN a FREE copy of this software???????? If you fiddle around on www.mymemories.com, and comment below about your favorite background, or template, and comment on this blog post which one is your favorite, you'll be entered to win a FREE copy!!!!
I made an album to share the pictures from the day we got engaged!!


Want to buy a copy? Visit http://www.mymemories.com/digital_scrapbooking_software to buy your own, and use this code: STMMMS16888 to save money on your order!!!
I've already made three albums in 2hours, and I haven't had ANY coffee yet!! So get creative and get excited to win your own My Memories Software!!
Friday, August 26, 2011
In the beginning...
Hi, my name is Autumn, and I am... a blogger. Or at least I'm trying to be one.
I have always loved scrapbooking, crafting and DIY (do it yourself) projects. When I was in college, I started a small craft business titled "Autumn's Blossoms." I mostly made things for friends, family and my sorority sisters. I loved that each item came out differently, I loved the planning of each item, and figuring out how to implement my ideas (most of the time). I was even voted "Most Crafty" in my sorority (THANKS LADIES)!!!
As of now, I am a recent college graduate and a working girl, just trying to make a living. I don't have as much time as I would like to create things, so I figured DIY-ing my wedding would be the perfect way to get back into crafting especially because I am obsessed with weddings! The planning, the pictures, the romance, the flowers and the creativity to make it your own, but I never realized how much goes into one before I started planning my own wedding after I got engaged!
Recently, I've been having some trouble with my planning. It is so hard to decide on a style, a venue, even a season and especially make decisions that my fiance and I can agree on (mainly cause he wants it to be one big football field and serve buffalo wings). I can only talk about weddings so much with my friends, so why not do what everyone else does, and take my thoughts and publish them for the entire world to read on the internet.
Now that I'm making my way down the aisle, and have many stops to make before I say, "I do", what better way to figure things out and share my advice than making my own blog. I hope you enjoy my ideas, humor and ultimately my wedding! Buckle-up everyone, it's going to be a bumpy ride!
I have always loved scrapbooking, crafting and DIY (do it yourself) projects. When I was in college, I started a small craft business titled "Autumn's Blossoms." I mostly made things for friends, family and my sorority sisters. I loved that each item came out differently, I loved the planning of each item, and figuring out how to implement my ideas (most of the time). I was even voted "Most Crafty" in my sorority (THANKS LADIES)!!!
As of now, I am a recent college graduate and a working girl, just trying to make a living. I don't have as much time as I would like to create things, so I figured DIY-ing my wedding would be the perfect way to get back into crafting especially because I am obsessed with weddings! The planning, the pictures, the romance, the flowers and the creativity to make it your own, but I never realized how much goes into one before I started planning my own wedding after I got engaged!
Recently, I've been having some trouble with my planning. It is so hard to decide on a style, a venue, even a season and especially make decisions that my fiance and I can agree on (mainly cause he wants it to be one big football field and serve buffalo wings). I can only talk about weddings so much with my friends, so why not do what everyone else does, and take my thoughts and publish them for the entire world to read on the internet.
Now that I'm making my way down the aisle, and have many stops to make before I say, "I do", what better way to figure things out and share my advice than making my own blog. I hope you enjoy my ideas, humor and ultimately my wedding! Buckle-up everyone, it's going to be a bumpy ride!
Subscribe to:
Posts (Atom)